How to install Debian Linux with dualboot on Lenovo Yoga 900s

November 26th, 2016

Initially It was not posible to install Linux on Lenovo Yoga 900s ( Yoga 900S-12ISK) due a non standard Harddisk access method. It was thought that Lenovo had a plot with Microsoft to avoid Linux to be installed on this laptop. But Lenovo answers with a BIOS release that makes posible to install Linux. I really like this laptop, fanless, long battery, light, tablet mode and Linux compatible.

yoga-lenovo-900s-debian

This post is a tutorial that describes howto install Debian Linux and dual boot with Windows 10 partition. This tutorial is for advanced users, please use at you own risk.

Back up drivers & create a Windows 10 USB

In order to have Windows working on this laptop you have to reinstall it with the new AHCI mode. Note that Lenovo does not support Windows with the Linux compatible firmware.

To do that you need to follow these steps:

  • Copy all Lenovo driver from D: unit to an external USB.
  • Create a windows media USB , with the Microsoft Windows 10 media creation tool.

You need to have two usb, one with the drivers and another with the Windows 10.

Install BIOS linux compatible firmware

Once all done, download the BIOS firmware that allows Linux to work. Lenovo download link. Boot Windows and install the new BIOS firmware.

As you can see, there is a new option on the BIOS. Change it from RAID to AHCI.
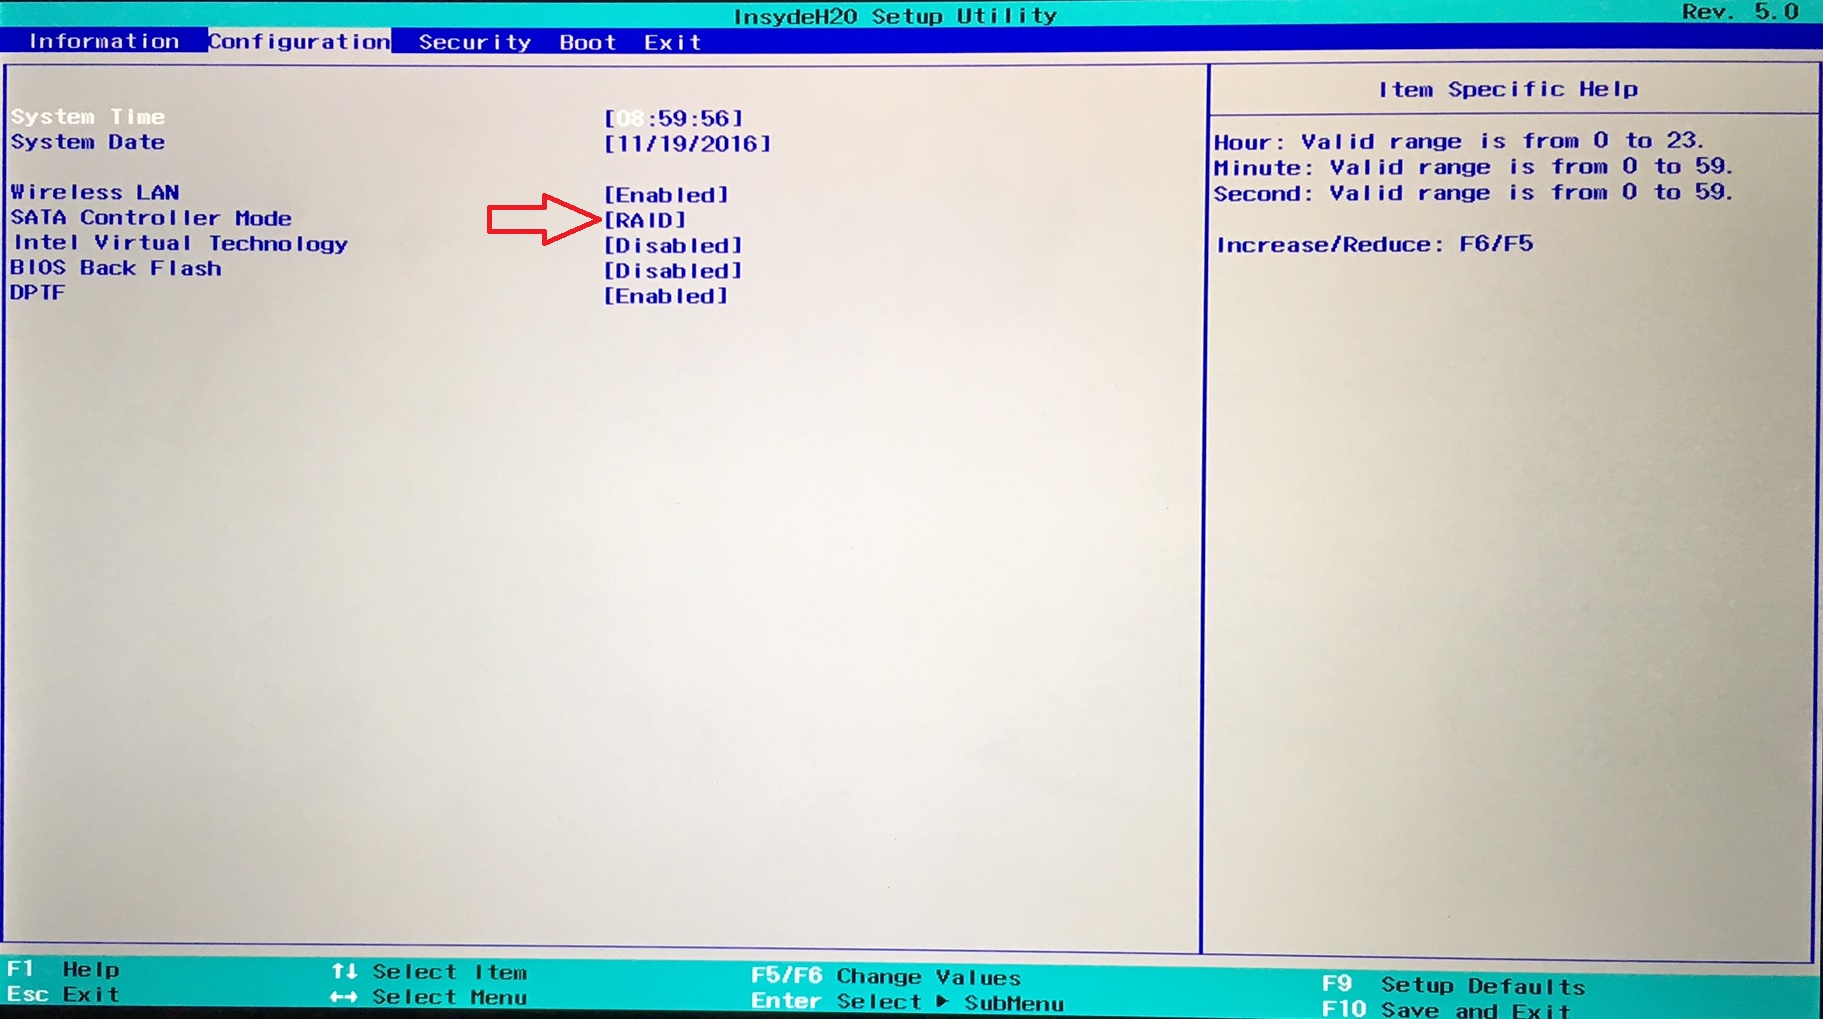
bios-ahci

Now the factory Windows install will not work, It was installed on RAID mode and doesn’t works on AHCI mode.

windows-fails

Don’t worry we can reinstall Windows, with the new AHCI mode.

Reinstall Windows and drivers

Now, boot with Windows 10 media USB, delete all partitions, create a smaller partition (in my case 64GB), windows will create additional partitions. Complete the Windows installation process. The windows will be activated as they will recognize the laptop has license for Windows 10. Doing that you will loose your recovery partition and could not restore to factory setting, and probably you could not install Windows in RAID mode again, make it at your risk.

After installed Windows, install one by one all the drivers, you previously copied to the USB.
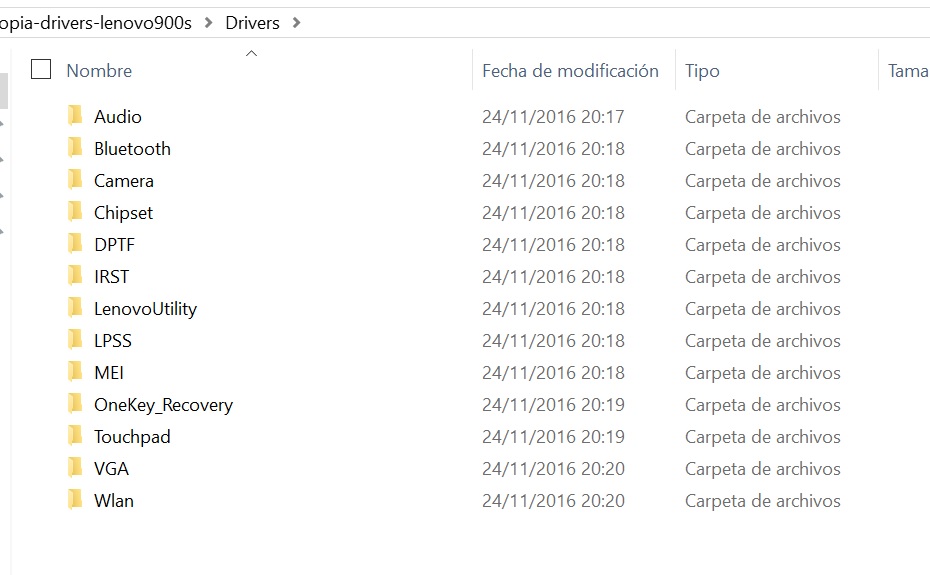
drivers-lenovo

That’s it, we have a windows installed on “Linux compatible mode”.


windows-screenshoot

Install Debian

Now It is time to install Debian. I have tried with Debian Jessie with no luck, the grub didn’t installed on the disk.
Then I tried Debian testing Stretch ant it works!!!

http://cdimage.debian.org/cdimage/stretch_di_alpha8/amd64/iso-dvd/debian-stretch-DI-alpha8-amd64-DVD-1.iso

After the installation we need to add the nonfree firmware for the wireless card, install this .deb

http://ftp.us.debian.org/debian/pool/non-free/f/firmware-nonfree/firmware-brcm80211_20160824-1_all.deb

Now everything is working

Wifi: OK (non-free)
Xwindow 3D: OK
Sound: OK
Suspend: OK
WEBCAM: OK
Touchscreen: Works as the mouse pointer.
Trackpad: OK
Active Pen with pressure levels: OK
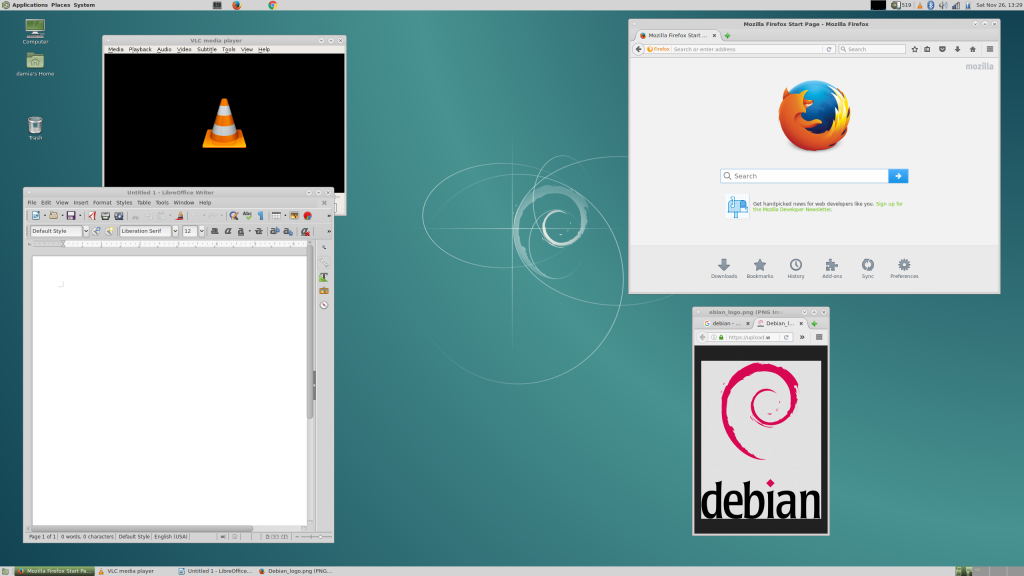
 

debian-lenovo-900s-screenshot

How to reinstall  GRUB in the boot in the EFI if Windows remove it.

I don’t know why but Windows, have replaced once the grub from the boot. In order to fix that I have used EASYUEFI  it is a windows software, the free version works great.

You have to create a new boot entry with Linux type and add grubx64.efi file.
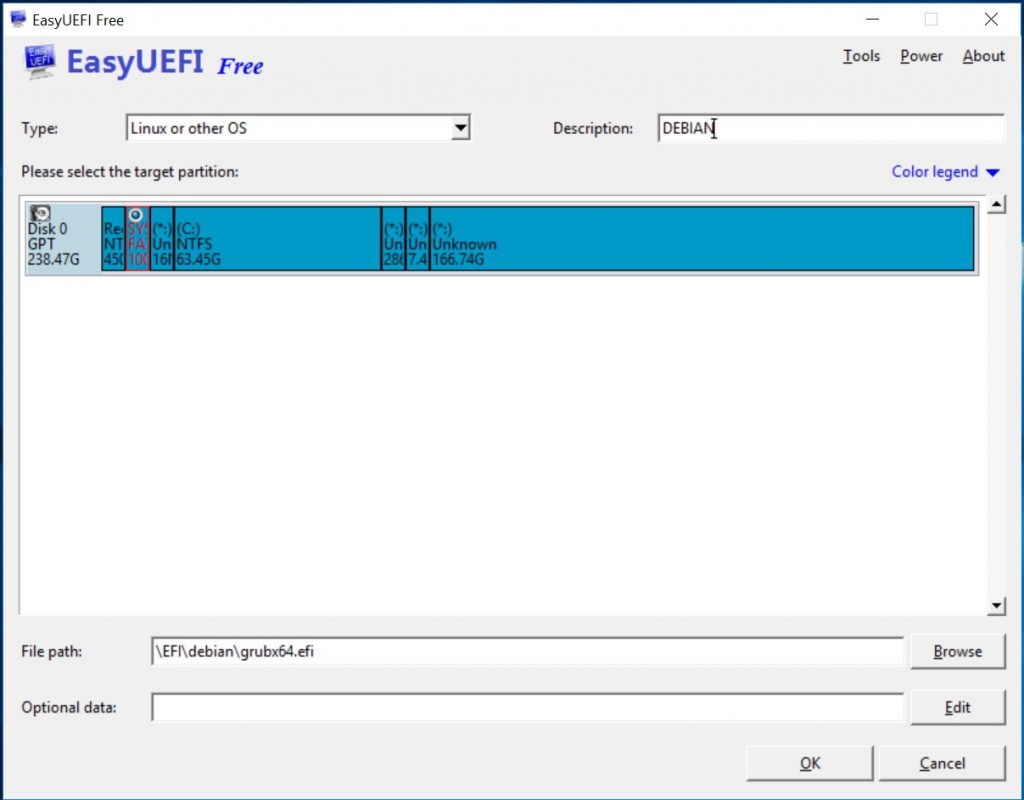
easyuefi

and later put that boot option the first.

Automated rotation screen

The automated accelerometer rotation when used in tablet mode or even vertical works with the standard Debian package. The needed package is iio-sensor-proxy:

apt-get install iio-sensor-proxy

But in my case I prefer to disable the rotation, because for me is too sensitive and change orientation when I move the laptop on the sofa 😉 Then

systemctl stop iio-sensor-proxy

Pending TODO Investigations

  • The screen resolution is very high and things are very small. I need to investigate howto make things bigger.

More info

Lenovo forums are a good place to look for more info

https://forums.lenovo.com/t5/Linux-Discussion/bd-p/Special_Interest_Linux

https://forums.lenovo.com/t5/Lenovo-Yoga-Series-Notebooks/Yoga-900-and-Ideapad-710S-Linux-Only-BIOS/ta-p/3466850

https://forums.lenovo.com/t5/Linux-Discussion/Howto-Dualboot-Linux-and-Windows-10-on-Lenovo-900s/td-p/3491910


Facebooktwitterredditpinterestlinkedinmail

Let’s encrypt automation on Debian

December 3rd, 2015

NOTE: This article is old, this hack is no longer necessary, as Debian includes dehydrated that makes all the work.

letsencrypt
Free SSL certificates for everyone! the https://letsencrypt.org/ initiative backed by Akamai, Cisco, Mozilla and EFF, is going to offer free certificates. On this post I am going to explain how I have automated the process of creation and renewal of certificates, on a Debian server with a lot of virtualhosts with the minimal modification of the apache conf files.

The idea of the project is to extend the use of SSL certificates everywhere, the aproach of the project is that the process of provisioning certificates is selfprovisioned from the servers with no manual interaction, to force that the certificates expiration is 90 days, forcing sysadmins to automate the proccess.

In order to validate and sign the certificate the Let’s Encrypt CA, will use the DNS and will query your webserver for some credentials issued during the certificate generation.
Moreover your webserver will have to answer to some queries from the CA during the issue and renewal of certificates. The let’s encrypt software is able to modify your webserver setup, or can launch its own webserver, but none of these aproaches are aceptable for me, I want to have full control of the webserver, and make only controlled changes, there are a lot specific apache setups. Fortunately Let’s encrypt offer us a useful option called webroot that only need to put files on a place on your website, this allow us to create an automated script with full control of what is being done.

First at all we follow the instructions to install the letsencrypt binaries:


apt-get install git
git clone https://github.com/letsencrypt/letsencrypt
cd letsencrypt
./letsencrypt-auto

Let’s go, the only modification on the webserver in order to answer the challenges is this:


Alias /.well-known /var/www/html/le/.well-known

Restart apache, and then you can launch the command to issue your new certificate.


/root/.local/share/letsencrypt/bin/letsencrypt --renew-by-default -a webroot --webroot-path /var/www/html/le/ --server https://acme-v01.api.letsencrypt.org/directory --email admin@damia.net --text --agree-tos --agree-dev-preview -d eblog.damia.net auth

Then you have your certificates ready at:

/etc/letsencrypt/live/eblog.damia.net/cert.pem
/etc/letsencrypt/live/eblog.damia.net/chain.pem
/etc/letsencrypt/live/eblog.damia.net/fullchain.pem
/etc/letsencrypt/live/eblog.damia.net/privkey.pem

Then you can create a new virtualhost on port 443, with:


[...]
SSLEngine on
SSLCertificateFile /etc/letsencrypt/live/eblog.damia.net/cert.pem
SSLCertificateKeyFile /etc/letsencrypt/live/eblog.damia.net/privkey.pem
SSLCertificateChainFile /etc/letsencrypt/live/eblog.damia.net/fullchain.pem
[...]

Done, you have your new certificate!

We can automate all the process of creation and renewal, I have developed a script that automate some tasks like:

  • Check the expire date of the certificate and renew when the remaining days are below a value
  • Check that the directory for the challenge is well mapped
  • Alert the admin if it is not posible to renew the certificate

You can see the code here, or you can download the file autole

#!/bin/bash
##
##
## LETS ENCRYPT AUTOMATION
##
## by Damia Soler
## Contact damia (at) damia (dot) net
## https://blog.damia.net
## https://github.com/damiadev/autole/
##
##
##==================================================
## SETUP
##
##
##
## REMAINING DAYS TO EXPIRE BEFORE RENEW
##
DAYSTORENEW=10
##
## REMAINING DAYS TO EXPIRE BEFORE ALERT
##
DAYSTOALERT=5
##
## EMAIL TO ALERT IF UNABLE TO RENEW
##
ALERTEMAIL=root@localhost
##
## EMAIL ACCOUNT ON LETS ENCRYPT
##
LEEMAIL=admin@example.com
##
WEBROOT=/www/htdocs/le/
##WEBROOT=/www/htdocs/le/$1
##
##
LEBIN=/root/.local/share/letsencrypt/bin/letsencrypt
##
CERTFILE=/etc/letsencrypt/live/$1/cert.pem
##====================================================================================
if test $1 = "--renew-all" ; then
echo Checking certificates
ls -1 /etc/letsencrypt/live|xargs -n1 $0 ;
/etc/init.d/apache2 graceful
exit ;
fi;
##====================================================================================
if test -a $CERTFILE ; then
d1=$(date -d "`openssl x509 -in $CERTFILE -text -noout|grep "Not After"|cut -c 25-`" +%s)
d2=$(date -d "now" +%s)
DAYS=` echo \( $d1 - $d2 \) / 86400 |bc `
echo -n `date` DOMAIN $1 will expire in $DAYS days " "
else
echo -n `date` DOMAIN $1 new
DAYS=$DAYSTOALERT;
fi;
if test $DAYS -lt $DAYSTORENEW ; then
echo Trying to renew ;
### PRETEST TO NOT MESS LE SERVERS IF YOU ARE NOT ANSWERING THE CHALLENGE
TESTFILE=$RANDOM
echo test> $WEBROOT/.well-known/acme-challenge/$TESTFILE
URL=http://$1/.well-known/acme-challenge/$TESTFILE
mkdir -p $WEBROOT/.well-known/acme-challenge
touch $WEBROOT/.well-known/acme-challenge/index.html
echo test> $WEBROOT/.well-known/acme-challenge/$TESTFILE
if curl --output /dev/null --silent --head --fail "$URL"; then
echo $LEBIN --renew-by-default -a webroot --webroot-path $WEBROOT --email $LEEMAIL --text --agree-tos -d $1 auth
$LEBIN --renew-by-default -a webroot --webroot-path $WEBROOT --email $LEEMAIL --text --agree-tos -d $1 auth
echo SSLEngine on
echo SSLCertificateFile /etc/letsencrypt/live/$1/cert.pem
echo SSLCertificateKeyFile /etc/letsencrypt/live/$1/privkey.pem
echo SSLCertificateChainFile /etc/letsencrypt/live/$1/fullchain.pem
else
echo "CAN NOT ACCESS THE PRE-CHALLENGE $URL PLEASE ADD ALIAS TO YOUR VIRTUALHOST CONF" ;
echo "Alias /.well-known $WEBROOT/.well-known" ;
fi
rm $WEBROOT/.well-known/acme-challenge/$TESTFILE
else
echo no close to expire ;
fi ;

if test $DAYS -lt $DAYSTOALERT ; then
echo ALERT DOMAIN $1 CERTIFICATE RENEWAL PROBLEM|mail $ALERTEMAIL ;
echo ALERT DOMAIN $1 CERTIFICATE RENEWAL PROBLEM ;
fi;

You can use

./autole www.mydomain.com

And you will have your new certificate available for this domain. (remeber to add previously the alias on apache).

And

./autole --renew-all

And all your certificates will be renewed. The idea is to add this to the crontab, and your certificates will be ready and renew automatically.

Facebooktwitterredditpinterestlinkedinmail

Outgoing SMTP server monitoring

March 1st, 2015

Mail service monitoring is not as easy as web monitoring, even outgoing smtp is more difficult to monitorize. We can summarize some service problems and how to monitorize them:

  • Mail is not being delivered: This could happen due to connectivity problems, unavailability of remote servers, software problem of the mail server, etc. To monitorize it simply check how long is the pending queue of mails.
    On a postfix we can use this script that warns us when a threshold is reached:

    mailq|grep "@" > /tmp/queue.txt

    if test `cat /tmp/queue.txt|wc -l` -gt 100 ; then
    /usr/local/bin/mobilealert TOO_MANY_MAILS_ON_QUEUE ;
    cat /tmp/queue.txt |mail -s TOO_MANY_MAILS_ON_QUEUE_`cat /tmp/queue.txt|wc -l` admin@company.com ;
    fi;

  • Mail is being bounced: A big problem that you could have is that your mail is being bounced by remote servers, we have to detect when our mails are bounced cause are ourself, and the cause is not on remote side.
    Example of remote side bounce causes:
    -Account doesn’t exist.
    -Quota exceed
    -Domain not accepted on remote server (missconfigured)
    -Other
    Example of ourself bounce causes:
    -Our server IP is in a black list.
    -Content is being rejected by content SPAM or malware.
    That is difficult to monitor, due that each server explain the error as a description. Our approach on that is to monitor how many entries we have, eliminating remote side causes (as many as possible).
    This could be done for postfix log with this script:

    cat /var/log/mail.log|grep -i " 550 " |\
    grep -v "mailbox unavailable"|grep -i -v "Invalid recipient"|\
    grep -i -v "does not exist"|grep -i -v "invalid address"|grep -v -i quota |grep -v -i Unknown|\
    grep -v -i "Address rejected"| \
    grep -v -i "invalid user"| \
    grep -v -i "Mailbox unavailable"| \
    grep -v -i "Mailbox disabled"| \
    grep -v -i "relay not permitted"| \
    grep -v -i "Account disabled"| \
    grep -v -i "Invalid local address"| \
    grep -v "no mailbox"|grep -v "recipient rejected"> /tmp/bounced.txt
    if test `cat /tmp/bounced.txt|wc -l` -ne 0 ; then
    mail -s BOUNCED_MAILS_`cat /tmp/bounced.txt|wc -l` admin@company.com < /tmp/bounced.txt ; fi ; if test `cat /tmp/bounced.txt|wc -l` -gt 20 ; then /usr/local/bin/msg2mobile TOO_MANY_BOUNCES ; fi;

    As we explain this approach is not perfect due to the impossibility to identify local problems vs remote problems, It is very important to adjust the threshold according the server load.
  • Facebooktwitterredditpinterestlinkedinmail

    How to monitor changes on the Amazon AWS firewall rules

    February 1st, 2015

    If you have your cloud infraestructure on Amazon AWS for audit and control purposes you may want monitor when the firewall rules of any of your security groups have changed.

    With this script you will get notified when any of the security groups are modified.


    # AWS credentials
    export EC2_KEYPAIR=GIJDUYE75JRHFJEJEBHFHEJE88E8ZGGG # name only, not the file name
    export EC2_URL=https://ec2.eu-west-1.amazonaws.com
    export EC2_PRIVATE_KEY=$HOME/.certs/pk-GIJDUYE75JRHFJEJEBHFHEJE88E8ZGGG.pem
    export EC2_CERT=$HOME/.certs/cert-GIJDUYE75JRHFJEJEBHFHEJE88E8ZGGG.pem
    export JAVA_HOME=/usr/lib/jvm/java-1.7.0-openjdk-amd64
    # aws commands
    ec2-describe-group > /home/ubuntu/.audi/group.txt
    diff /home/ubuntu/.audi/group.txt /home/ubuntu/.audi/group-old.txt> /home/ubuntu/.audi/diff.txt
    if test `cat /home/ubuntu/.audi/diff.txt|wc -l` != 0 ; then
    cat /home/ubuntu/.audi/diff.txt|mail -s FW_AMAZON alert@bpmalert.com ;
    /usr/local/bin/msg2mobile FW_AMAZON `cat diff.txt |grep PERMISSION|awk '{print($4)}'|head -1`;
    fi
    mv /home/ubuntu/.audi/group.txt /home/ubuntu/.audi/group-old.txt

    All the magic is done with the ec2-describe-group command, storing the current state and watching for differences.

    Facebooktwitterredditpinterestlinkedinmail

    How to see how many entries per minute we have on a log

    January 1st, 2015

    On this post We are going to explain a tip used to count log entries in order to compare load of a specific entries. Let’s explain it:

    We have a web server log, for example:

    179.158.24.43 - - [02/Nov/2013:17:46:51 +0100] "GET /blog/wp-includes/js/jquery/jquery.js?ver=1.10.2 HTTP/1.1" 304 214 "http://blog.dom.net/blog/" "Mozilla/5.0 (X11; Linux x86_64; rv:10.0.12) Gecko/20100101 Firefox/10.0.12 Iceweasel/10.0.12"
    179.158.24.43 - - [02/Nov/2013:17:46:51 +0100] "GET /blog/wp-content/themes/the-bootstrap/js/bootstrap.min.js?ver=2.0.3 HTTP/1.1" 304 212 "http://blog.damia.net/damianetblog/" "Mozilla/5.0 (X11; Linux x86_64; rv:10.0.12) Gecko/20100101 Firefox/10.0.12 Iceweasel/10.0.12"
    179.158.24.43 - - [02/Nov/2013:17:46:51 +0100] "GET /blog/wp-content/themes/the-bootstrap/js/the-bootstrap.min.js?ver=2.0.1 HTTP/1.1" 304 212 "http://blog.dom.net/damianetblog/" "Mozilla/5.0 (X11; Linux x86_64; rv:10.0.12) Gecko/20100101 Firefox/10.0.12 Iceweasel/10.0.12"
    179.158.24.43 - - [02/Nov/2013:17:46:58 +0100] "GET /blog/index.php/2011/1/manire/ HTTP/1.1" 200 4916 "http://blog.dom.net/blog/" "Mozilla/5.0 (X11; Linux x86_64; rv:10.0.12) Gecko/20100101 Firefox/10.0.12 Iceweasel/10.0.12"

    Let’s image we want to count how many entries have happened in order to compare the load of the server, we need then to compare on the same interval of time, the solution found is to watch one minute ago.

    Let’s made with this script:

    tail -1000 /var/log/apache2/access.log |grep -i ` date --date='1 minute ago' +%d/%b/%Y:%H:%M|cut -c 1-17`|wc -l

    This script will tell how many entries had the log one minute ago. We can grep it for look for a specific request, and see how many per minute We have.

    Facebooktwitterredditpinterestlinkedinmail

    External web monitoring pitfalls

    December 1st, 2014

    Today society requires services available 24×7, IT management requires knowledge of the state of the services offered. This necessity have created a lot of tools, products and services. The main approach for this is the external web monitoring.

    External web monitoring approach a tries to simulate the actions done by the clients, that is if the clients visits webpages, the monitor software will simulate as a client a request to the webserver, there are some pitfalls on that approach, let’s review them:

    Where is located the monitor? Is it representative of the location of clients? Could it detect WAN Network problems? Normally this is solved with monitors distributed across continents being representative of Internet world availability

    -Which is the url being monitored? It is very difficult to find a always representative URL, if you simply test a static web page the monitor will miss when the database is not working, the disk is full, or the application server is failing, even is difficult for the monitor to know if the answer of the page is right or not. If the monitor detects the page is failing that is true, but there could be a lot of times that the web is failing and the monitors didn’t notice it.

    The first approach:


    #wget http://www.bpmalert.com/index.html

    A better approach


    #wget http://www.bpmalert.com/register.php?user=test&data=test

    but the response from the webserver could be “200 OK” but the webpage could say “Database error”.

    Even accessing a simple url doesn’t emulate today web complexities, pages are not a simple url, it have a lot of components, and there are things like cookies, session id, ajax, that are not emulated.

    -Simulating user flow: As we explain if we limit the monitoring to only a url, you dind’t see the full flow of a web process, for example a real customer will register, receive a mail, click a link and then make a purchase. There are very complex tools that uses real browsers, with a recorded user session and so on, but is impossible to simulate a real user, only a real person could confirm that the web is working ok.

    There are some tools that emulates user behaviour but are more used to load tests than for availability monitoring, some of these tools are:

    As a conclusion the external monitoring of webservers are a necessary but they are imperfect, and must be completed with other business monitors in order to know that everything is working ok.

    Facebooktwitterredditpinterestlinkedinmail

    Observing apache logs for Troubleshooting

    November 1st, 2014

    Normaly when you are troubleshooting an Apache server you are checking parameters that don’t have monitors for them.

    With the “observate” aproach the best place too look at is:


    # tail -f /var/log/apache/access.log

    Things to check:

  • 200 OK requests are being served: This seems an obvious thing, you can see if there are normal traffic, or you can detect which pages are being accessed more, etc.
  • 50x server responses are not happening: May be there are some pages that are returning server error, may be you didn’t know it, but someone somewhere is getting errors from your page. If there are only a few 50x errors, it is not a problem to ignore, may be this error is happening when a critical process is being done(registering, updating), I suggest zero tolerance for 50x errors.
  • 404 server response are not being happening: If so it means that people are trying to access a non existant page, Sys admin will say this is not its responsability, sure It is a problem of the content but It is a problem for your customers, face it!
  • Let’s do in a basic way with:

    # tail -f /var/log/apache/access.log|egrep '404|500|503|504'

    But there is an advaced tool that read the logs and give you insights regarding the response codes, this tool is
    Apachetop, it allows you to overlook, after that for more details you have the real logs, tail and grep as your friends.

    On next post we will descrive other tools and techniques to check and test and monitor apache web servers, but we wanted to start with this “observate aproach”.

    Facebooktwitterredditpinterestlinkedinmail

    Lego WeDo with Debian Wheezy using scratch

    May 14th, 2014

    I bought a Lego WeDo set for my son, this set is composed by some lego technic pieces and a Hub with USB where you can connect a motor and two sensors, distance and tilt. This set works natively with Windows and OSX but not with Linux. The software includes gives you an educational graphical tool for programming based on scratch.

    lego wedo debian

    Scratch is a graphical programming tool for education designed by MIT, you can find more info on scratch website.
    The software included with Lego is a more simplistic and easy for kids kind of scratch, It has less options, bigger buttons, and sounds that match the lego instruction designs, this software is not free, It cost 85€ and is sold separately from the inital box (WTF!). However It is possible to use original MIT scratch with Lego WeDo and Linux.
    There are two versions of scratch, the 2.0 is web based and It doesn’t work with Lego and Linux, but the older on 1.4 works with Lego Wedo and It is included on Debian Wheezy.

    Then you need only to install the package:

    apt-get install scratch squeak-plugins-scratch

    Then you can plug the Lego Hub on a USB port, and you can see It is detected:
    [31412.408152] usb 3-3: new low-speed USB device number 2 using ohci_hcd
    [31412.575322] usb 3-3: New USB device found, idVendor=0694, idProduct=0003
    [31412.575333] usb 3-3: New USB device strings: Mfr=0, Product=2, SerialNumber=0
    [31412.575339] usb 3-3: Product: LEGO USB Hub V1.00
    [31412.895290] generic-usb 0003:0694:0003.0001: hiddev0,hidraw0: USB HID v1.10 Device [LEGO USB Hub V1.00] on usb-0000:00:12.0-3/input0
    [31412.895346] usbcore: registered new interface driver usbhid
    [31412.895350] usbhid: USB HID core driver

    But It doesn’t work, you need to add a udev rule, to do that create this file
    /etc/udev/rules.d/99-wedo.rules with this content
    ATTRS{idVendor}=="0694", ATTRS{idProduct}=="0003", SUBSYSTEMS=="usb", ACTION=="add", MODE="0666", GROUP="plugdev"

    Then restart udev with
    /etc/init.d/udev restart

    Now everything is ready, start the scratch from Applications->Education-> Scratch.

    Unhide the Lego Wedo options from the Edit Menu.
    lego wedo debian

    You will find new motion options

    lego wedo debian

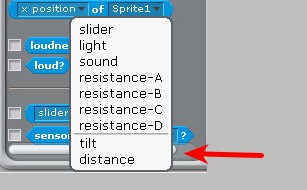
    And on the sensors you have the Lego Wedo sensors tilt and distance.

    lego wedo debian

    In order to wait until a sensors detect a condition you can use this structure, a wait condition, an operator and a sensor box like this.

    lego wedo debian

    That’s all you have Lego Wedo using scratch. Enjoy!

    Facebooktwitterredditpinterestlinkedinmail

    How to install Debian in Sony VAIO VPCYB2M1E

    July 14th, 2012

    As a Debian fan, I always want to install my favourite Linux distro Debian, on my personal laptop. Some months ago my wife give as a present a fantastic laptop a Sony VAIO VPCYB2M1E, It is a AMD E-350 CPU with 4GB of RAM.

    First try was to install Debian squeeze AMD64 , after some trys It willl work, wifi was working and xwindow too, but sound doesn’t work, the sound card was detected but I didn’t acomplish to select with the mixer the device to produce sound, other problem was the suspend, after suspending the machine the screen didn’t return, remaing black. I try severar tweaks with APM and Xwindow, but with no luck.

    I try to boot up a Ubuntu liveCD, it works well, even sound and suspend modes. But I don’t want Ubuntu, I want to have the real free distro Debian 🙂

    My next try was to update to the testing version of Debian “Wheezy”, I update to that version and the sound works, but I have problems with the kernel 3.2.0, during boot up it show snow on the screen….

    Snow screen Sony VAIO VPCYB2M1E

    After some googling I find out that the problem was loading some kernel modules that need some non-free binaries, the solution was easy:

    #apt-get install firmware-linux-nonfree

    Conclusion

    Now all I need is working well.

    Wifi: OK
    Xwindow: OK
    Sound: OK
    Suspend: OK
    WEBCAM: OK

    OpenGL Xwindow : No (pending to test propietary ATI drivers).
    Hibernate: Not tested
    HDMI out: Not tested
    VGA out: Not tested

    Laptop Debian ready!!!

    Sony VAIO VPCYB2M1E running DEBIAN Linux

    Facebooktwitterredditpinterestlinkedinmail

    Recipe: How to password recovery a Linux Amazon Ec2 instance

    September 14th, 2010

    Imagine you have an Amazon Ec2 instance, and you miss your ssh keys, and passwords. How can you execute a password recovery? That is easy, mount your disk on other machine to do that. First a t all you need and EBS root instance.

  • Stop the machine
  • Detach the volume from machine
  • Create a new machine on the same availability zone, for example a micro instance with fedora, an start it
  • Attach the volume to it, for example on /dev/sdh. Don’t use the elasticfox, I don’t know don’t work for me, use the aws web.
  • Mount the disk, change passwords, add ssh key, or any recovery action you need
  • Unmount the partition
  • You could terminate this instance is no longer needed
  • Attach the partition, to the same machine, don’t use the elasticI don’t know don’t work for me, use the aws web. IMPORTANT Attach to /dev/sda1.
  • Start the instance
  • That’s it, you have your instance recovered.

    Facebooktwitterredditpinterestlinkedinmail