Archive for the ‘howto’ Category

How to install Debian Linux with dualboot on Lenovo Yoga 900s

Saturday, November 26th, 2016

Initially It was not posible to install Linux on Lenovo Yoga 900s ( Yoga 900S-12ISK) due a non standard Harddisk access method. It was thought that Lenovo had a plot with Microsoft to avoid Linux to be installed on this laptop. But Lenovo answers with a BIOS release that makes posible to install Linux. I really like this laptop, fanless, long battery, light, tablet mode and Linux compatible.

yoga-lenovo-900s-debian

This post is a tutorial that describes howto install Debian Linux and dual boot with Windows 10 partition. This tutorial is for advanced users, please use at you own risk.

Back up drivers & create a Windows 10 USB

In order to have Windows working on this laptop you have to reinstall it with the new AHCI mode. Note that Lenovo does not support Windows with the Linux compatible firmware.

To do that you need to follow these steps:

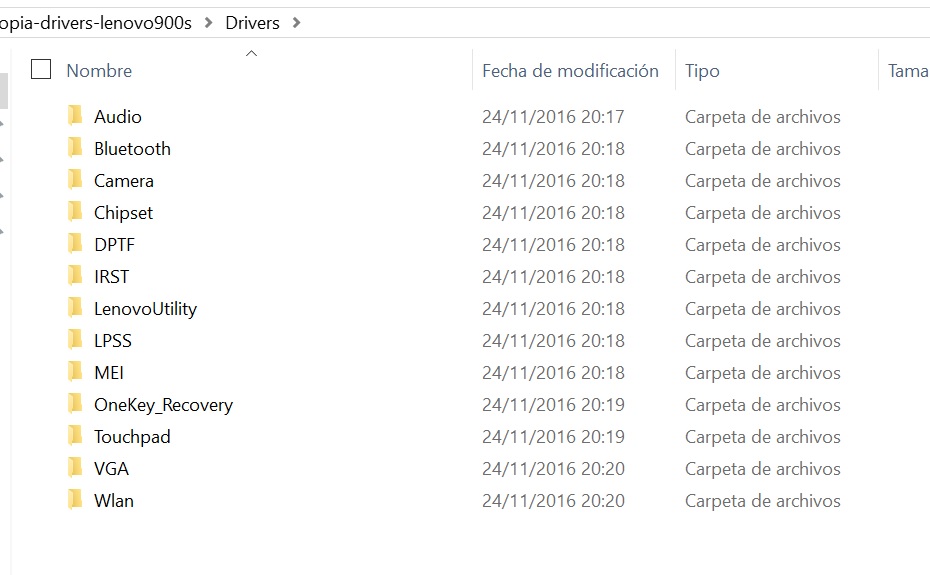
  • Copy all Lenovo driver from D: unit to an external USB.
  • Create a windows media USB , with the Microsoft Windows 10 media creation tool.

You need to have two usb, one with the drivers and another with the Windows 10.

Install BIOS linux compatible firmware

Once all done, download the BIOS firmware that allows Linux to work. Lenovo download link. Boot Windows and install the new BIOS firmware.

As you can see, there is a new option on the BIOS. Change it from RAID to AHCI.

bios-ahci

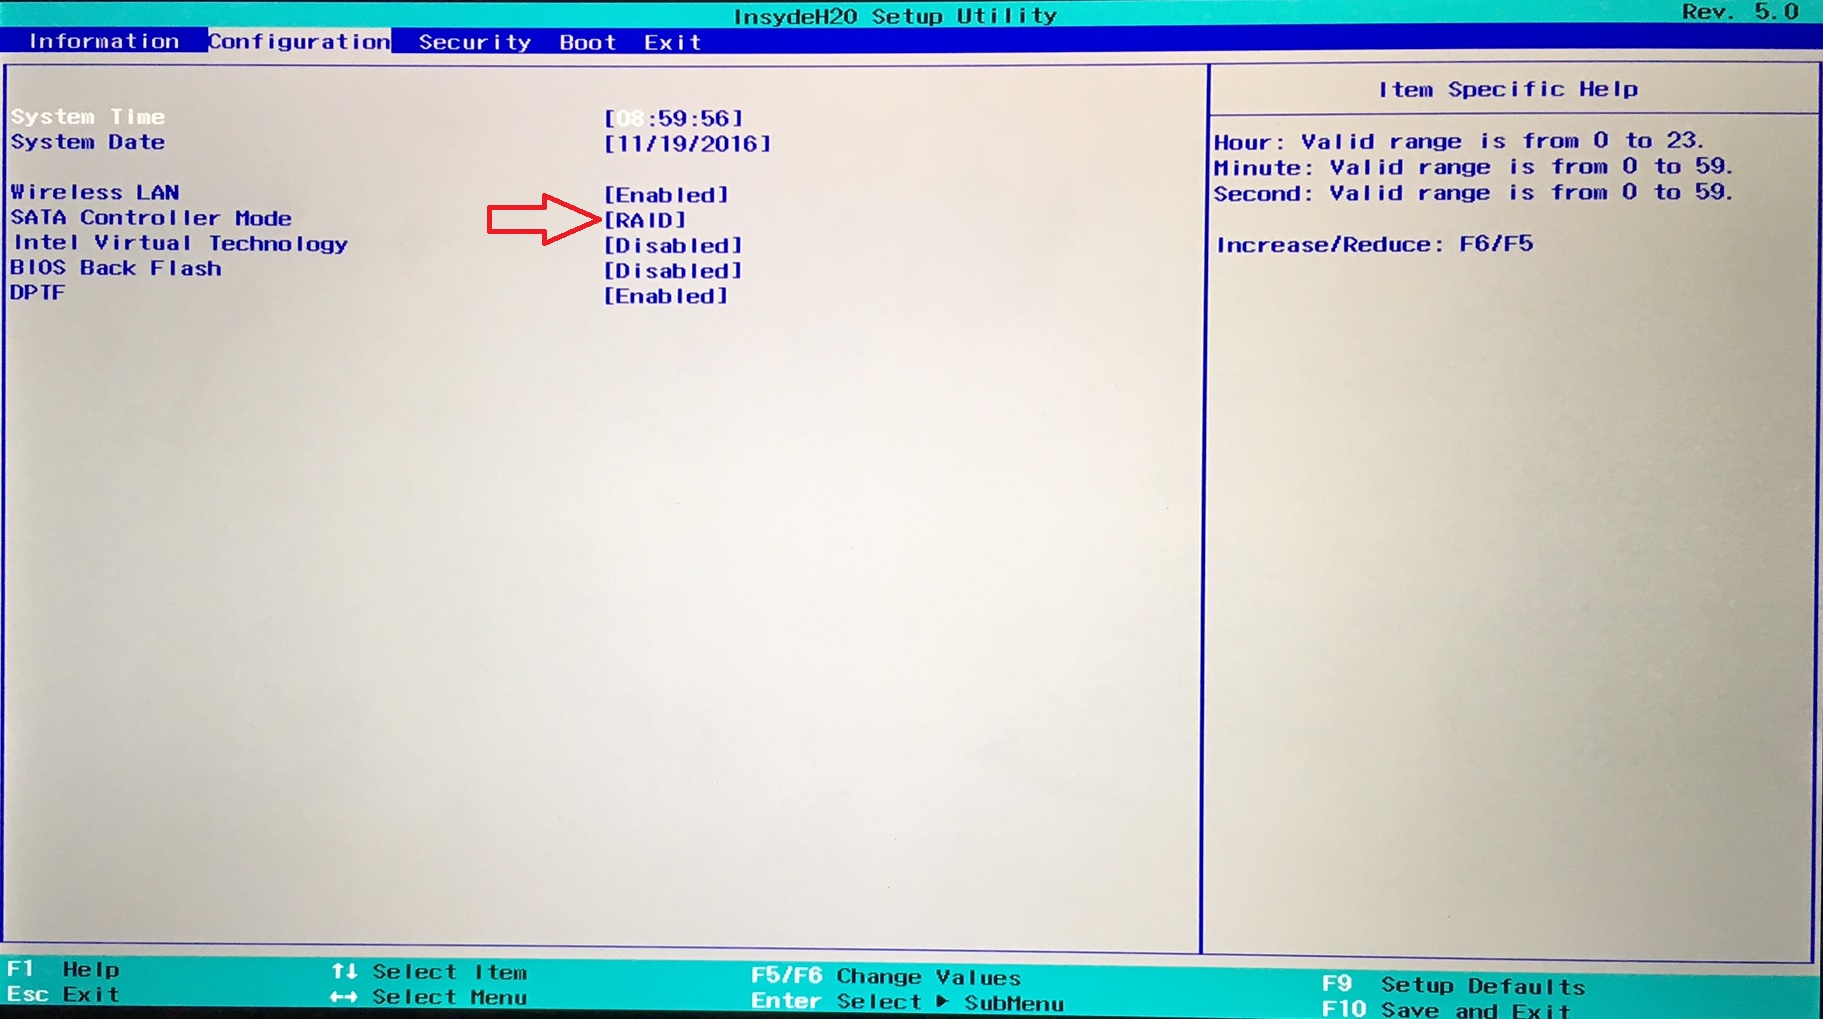
Now the factory Windows install will not work, It was installed on RAID mode and doesn’t works on AHCI mode.

windows-fails

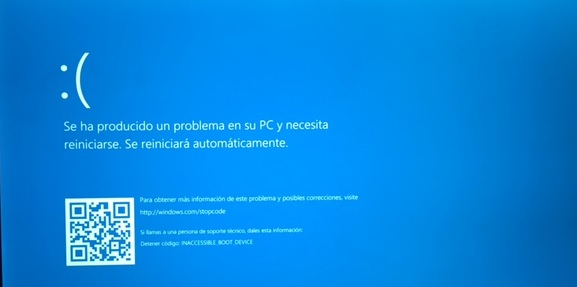
Don’t worry we can reinstall Windows, with the new AHCI mode.

Reinstall Windows and drivers

Now, boot with Windows 10 media USB, delete all partitions, create a smaller partition (in my case 64GB), windows will create additional partitions. Complete the Windows installation process. The windows will be activated as they will recognize the laptop has license for Windows 10. Doing that you will loose your recovery partition and could not restore to factory setting, and probably you could not install Windows in RAID mode again, make it at your risk.

After installed Windows, install one by one all the drivers, you previously copied to the USB.

drivers-lenovo

That’s it, we have a windows installed on “Linux compatible mode”.


windows-screenshoot

Install Debian

Now It is time to install Debian. I have tried with Debian Jessie with no luck, the grub didn’t installed on the disk.
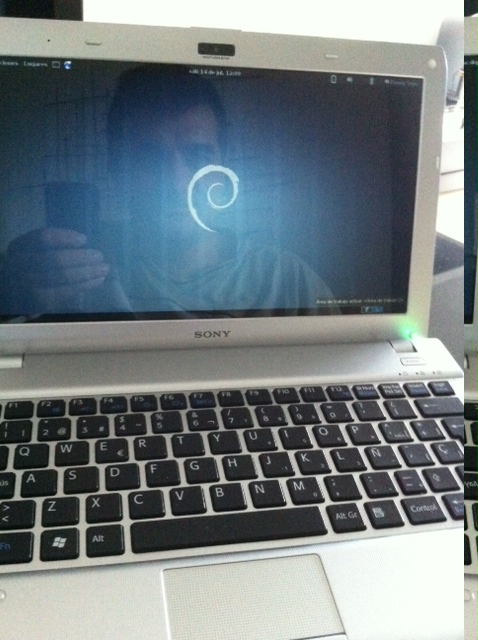
Then I tried Debian testing Stretch ant it works!!!

http://cdimage.debian.org/cdimage/stretch_di_alpha8/amd64/iso-dvd/debian-stretch-DI-alpha8-amd64-DVD-1.iso

After the installation we need to add the nonfree firmware for the wireless card, install this .deb

http://ftp.us.debian.org/debian/pool/non-free/f/firmware-nonfree/firmware-brcm80211_20160824-1_all.deb

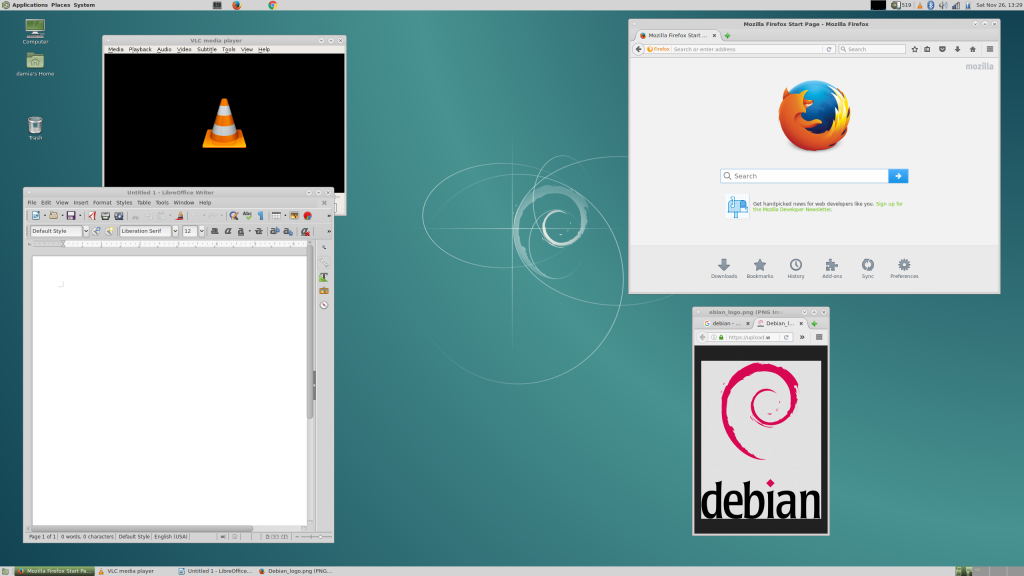
Now everything is working

Wifi: OK (non-free)
Xwindow 3D: OK
Sound: OK
Suspend: OK
WEBCAM: OK
Touchscreen: Works as the mouse pointer.
Trackpad: OK
Active Pen with pressure levels: OK


debian-lenovo-900s-screenshot

How to reinstall  GRUB in the boot in the EFI if Windows remove it.

I don’t know why but Windows, have replaced once the grub from the boot. In order to fix that I have used EASYUEFI  it is a windows software, the free version works great.

You have to create a new boot entry with Linux type and add grubx64.efi file.

easyuefi

and later put that boot option the first.

Automated rotation screen

The automated accelerometer rotation when used in tablet mode or even vertical works with the standard Debian package. The needed package is iio-sensor-proxy:

apt-get install iio-sensor-proxy

But in my case I prefer to disable the rotation, because for me is too sensitive and change orientation when I move the laptop on the sofa 😉 Then

systemctl stop iio-sensor-proxy

Pending TODO Investigations

  • The screen resolution is very high and things are very small. I need to investigate howto make things bigger.

More info

Lenovo forums are a good place to look for more info

https://forums.lenovo.com/t5/Linux-Discussion/bd-p/Special_Interest_Linux

https://forums.lenovo.com/t5/Lenovo-Yoga-Series-Notebooks/Yoga-900-and-Ideapad-710S-Linux-Only-BIOS/ta-p/3466850

https://forums.lenovo.com/t5/Linux-Discussion/Howto-Dualboot-Linux-and-Windows-10-on-Lenovo-900s/td-p/3491910


Facebooktwitterredditpinterestlinkedinmail

Let’s encrypt automation on Debian

Thursday, December 3rd, 2015

NOTE: This article is old, this hack is no longer necessary, as Debian includes dehydrated that makes all the work.

letsencrypt
Free SSL certificates for everyone! the https://letsencrypt.org/ initiative backed by Akamai, Cisco, Mozilla and EFF, is going to offer free certificates. On this post I am going to explain how I have automated the process of creation and renewal of certificates, on a Debian server with a lot of virtualhosts with the minimal modification of the apache conf files.

The idea of the project is to extend the use of SSL certificates everywhere, the aproach of the project is that the process of provisioning certificates is selfprovisioned from the servers with no manual interaction, to force that the certificates expiration is 90 days, forcing sysadmins to automate the proccess.

In order to validate and sign the certificate the Let’s Encrypt CA, will use the DNS and will query your webserver for some credentials issued during the certificate generation.
Moreover your webserver will have to answer to some queries from the CA during the issue and renewal of certificates. The let’s encrypt software is able to modify your webserver setup, or can launch its own webserver, but none of these aproaches are aceptable for me, I want to have full control of the webserver, and make only controlled changes, there are a lot specific apache setups. Fortunately Let’s encrypt offer us a useful option called webroot that only need to put files on a place on your website, this allow us to create an automated script with full control of what is being done.

First at all we follow the instructions to install the letsencrypt binaries:


apt-get install git
git clone https://github.com/letsencrypt/letsencrypt
cd letsencrypt
./letsencrypt-auto

Let’s go, the only modification on the webserver in order to answer the challenges is this:


Alias /.well-known /var/www/html/le/.well-known

Restart apache, and then you can launch the command to issue your new certificate.


/root/.local/share/letsencrypt/bin/letsencrypt --renew-by-default -a webroot --webroot-path /var/www/html/le/ --server https://acme-v01.api.letsencrypt.org/directory --email admin@damia.net --text --agree-tos --agree-dev-preview -d eblog.damia.net auth

Then you have your certificates ready at:

/etc/letsencrypt/live/eblog.damia.net/cert.pem
/etc/letsencrypt/live/eblog.damia.net/chain.pem
/etc/letsencrypt/live/eblog.damia.net/fullchain.pem
/etc/letsencrypt/live/eblog.damia.net/privkey.pem

Then you can create a new virtualhost on port 443, with:


[...]
SSLEngine on
SSLCertificateFile /etc/letsencrypt/live/eblog.damia.net/cert.pem
SSLCertificateKeyFile /etc/letsencrypt/live/eblog.damia.net/privkey.pem
SSLCertificateChainFile /etc/letsencrypt/live/eblog.damia.net/fullchain.pem
[...]

Done, you have your new certificate!

We can automate all the process of creation and renewal, I have developed a script that automate some tasks like:

  • Check the expire date of the certificate and renew when the remaining days are below a value
  • Check that the directory for the challenge is well mapped
  • Alert the admin if it is not posible to renew the certificate

You can see the code here, or you can download the file autole

#!/bin/bash
##
##
## LETS ENCRYPT AUTOMATION
##
## by Damia Soler
## Contact damia (at) damia (dot) net
## https://blog.damia.net
## https://github.com/damiadev/autole/
##
##
##==================================================
## SETUP
##
##
##
## REMAINING DAYS TO EXPIRE BEFORE RENEW
##
DAYSTORENEW=10
##
## REMAINING DAYS TO EXPIRE BEFORE ALERT
##
DAYSTOALERT=5
##
## EMAIL TO ALERT IF UNABLE TO RENEW
##
ALERTEMAIL=root@localhost
##
## EMAIL ACCOUNT ON LETS ENCRYPT
##
LEEMAIL=admin@example.com
##
WEBROOT=/www/htdocs/le/
##WEBROOT=/www/htdocs/le/$1
##
##
LEBIN=/root/.local/share/letsencrypt/bin/letsencrypt
##
CERTFILE=/etc/letsencrypt/live/$1/cert.pem
##====================================================================================
if test $1 = "--renew-all" ; then
echo Checking certificates
ls -1 /etc/letsencrypt/live|xargs -n1 $0 ;
/etc/init.d/apache2 graceful
exit ;
fi;
##====================================================================================
if test -a $CERTFILE ; then
d1=$(date -d "`openssl x509 -in $CERTFILE -text -noout|grep "Not After"|cut -c 25-`" +%s)
d2=$(date -d "now" +%s)
DAYS=` echo \( $d1 - $d2 \) / 86400 |bc `
echo -n `date` DOMAIN $1 will expire in $DAYS days " "
else
echo -n `date` DOMAIN $1 new
DAYS=$DAYSTOALERT;
fi;
if test $DAYS -lt $DAYSTORENEW ; then
echo Trying to renew ;
### PRETEST TO NOT MESS LE SERVERS IF YOU ARE NOT ANSWERING THE CHALLENGE
TESTFILE=$RANDOM
echo test> $WEBROOT/.well-known/acme-challenge/$TESTFILE
URL=http://$1/.well-known/acme-challenge/$TESTFILE
mkdir -p $WEBROOT/.well-known/acme-challenge
touch $WEBROOT/.well-known/acme-challenge/index.html
echo test> $WEBROOT/.well-known/acme-challenge/$TESTFILE
if curl --output /dev/null --silent --head --fail "$URL"; then
echo $LEBIN --renew-by-default -a webroot --webroot-path $WEBROOT --email $LEEMAIL --text --agree-tos -d $1 auth
$LEBIN --renew-by-default -a webroot --webroot-path $WEBROOT --email $LEEMAIL --text --agree-tos -d $1 auth
echo SSLEngine on
echo SSLCertificateFile /etc/letsencrypt/live/$1/cert.pem
echo SSLCertificateKeyFile /etc/letsencrypt/live/$1/privkey.pem
echo SSLCertificateChainFile /etc/letsencrypt/live/$1/fullchain.pem
else
echo "CAN NOT ACCESS THE PRE-CHALLENGE $URL PLEASE ADD ALIAS TO YOUR VIRTUALHOST CONF" ;
echo "Alias /.well-known $WEBROOT/.well-known" ;
fi
rm $WEBROOT/.well-known/acme-challenge/$TESTFILE
else
echo no close to expire ;
fi ;

if test $DAYS -lt $DAYSTOALERT ; then
echo ALERT DOMAIN $1 CERTIFICATE RENEWAL PROBLEM|mail $ALERTEMAIL ;
echo ALERT DOMAIN $1 CERTIFICATE RENEWAL PROBLEM ;
fi;

You can use

./autole www.mydomain.com

And you will have your new certificate available for this domain. (remeber to add previously the alias on apache).

And

./autole --renew-all

And all your certificates will be renewed. The idea is to add this to the crontab, and your certificates will be ready and renew automatically.

Facebooktwitterredditpinterestlinkedinmail

Lego WeDo with Debian Wheezy using scratch

Wednesday, May 14th, 2014

I bought a Lego WeDo set for my son, this set is composed by some lego technic pieces and a Hub with USB where you can connect a motor and two sensors, distance and tilt. This set works natively with Windows and OSX but not with Linux. The software includes gives you an educational graphical tool for programming based on scratch.

lego wedo debian

Scratch is a graphical programming tool for education designed by MIT, you can find more info on scratch website.
The software included with Lego is a more simplistic and easy for kids kind of scratch, It has less options, bigger buttons, and sounds that match the lego instruction designs, this software is not free, It cost 85€ and is sold separately from the inital box (WTF!). However It is possible to use original MIT scratch with Lego WeDo and Linux.
There are two versions of scratch, the 2.0 is web based and It doesn’t work with Lego and Linux, but the older on 1.4 works with Lego Wedo and It is included on Debian Wheezy.

Then you need only to install the package:

apt-get install scratch squeak-plugins-scratch

Then you can plug the Lego Hub on a USB port, and you can see It is detected:
[31412.408152] usb 3-3: new low-speed USB device number 2 using ohci_hcd
[31412.575322] usb 3-3: New USB device found, idVendor=0694, idProduct=0003
[31412.575333] usb 3-3: New USB device strings: Mfr=0, Product=2, SerialNumber=0
[31412.575339] usb 3-3: Product: LEGO USB Hub V1.00
[31412.895290] generic-usb 0003:0694:0003.0001: hiddev0,hidraw0: USB HID v1.10 Device [LEGO USB Hub V1.00] on usb-0000:00:12.0-3/input0
[31412.895346] usbcore: registered new interface driver usbhid
[31412.895350] usbhid: USB HID core driver

But It doesn’t work, you need to add a udev rule, to do that create this file
/etc/udev/rules.d/99-wedo.rules with this content
ATTRS{idVendor}=="0694", ATTRS{idProduct}=="0003", SUBSYSTEMS=="usb", ACTION=="add", MODE="0666", GROUP="plugdev"

Then restart udev with
/etc/init.d/udev restart

Now everything is ready, start the scratch from Applications->Education-> Scratch.

Unhide the Lego Wedo options from the Edit Menu.
lego wedo debian

You will find new motion options

lego wedo debian

And on the sensors you have the Lego Wedo sensors tilt and distance.

lego wedo debian

In order to wait until a sensors detect a condition you can use this structure, a wait condition, an operator and a sensor box like this.

lego wedo debian

That’s all you have Lego Wedo using scratch. Enjoy!

Facebooktwitterredditpinterestlinkedinmail

How to install Debian in Sony VAIO VPCYB2M1E

Saturday, July 14th, 2012

As a Debian fan, I always want to install my favourite Linux distro Debian, on my personal laptop. Some months ago my wife give as a present a fantastic laptop a Sony VAIO VPCYB2M1E, It is a AMD E-350 CPU with 4GB of RAM.

First try was to install Debian squeeze AMD64 , after some trys It willl work, wifi was working and xwindow too, but sound doesn’t work, the sound card was detected but I didn’t acomplish to select with the mixer the device to produce sound, other problem was the suspend, after suspending the machine the screen didn’t return, remaing black. I try severar tweaks with APM and Xwindow, but with no luck.

I try to boot up a Ubuntu liveCD, it works well, even sound and suspend modes. But I don’t want Ubuntu, I want to have the real free distro Debian 🙂

My next try was to update to the testing version of Debian “Wheezy”, I update to that version and the sound works, but I have problems with the kernel 3.2.0, during boot up it show snow on the screen….

Snow screen Sony VAIO VPCYB2M1E

After some googling I find out that the problem was loading some kernel modules that need some non-free binaries, the solution was easy:

#apt-get install firmware-linux-nonfree

Conclusion

Now all I need is working well.

Wifi: OK
Xwindow: OK
Sound: OK
Suspend: OK
WEBCAM: OK

OpenGL Xwindow : No (pending to test propietary ATI drivers).
Hibernate: Not tested
HDMI out: Not tested
VGA out: Not tested

Laptop Debian ready!!!

Sony VAIO VPCYB2M1E running DEBIAN Linux

Facebooktwitterredditpinterestlinkedinmail

Recipe: How to password recovery a Linux Amazon Ec2 instance

Tuesday, September 14th, 2010

Imagine you have an Amazon Ec2 instance, and you miss your ssh keys, and passwords. How can you execute a password recovery? That is easy, mount your disk on other machine to do that. First a t all you need and EBS root instance.

  • Stop the machine
  • Detach the volume from machine
  • Create a new machine on the same availability zone, for example a micro instance with fedora, an start it
  • Attach the volume to it, for example on /dev/sdh. Don’t use the elasticfox, I don’t know don’t work for me, use the aws web.
  • Mount the disk, change passwords, add ssh key, or any recovery action you need
  • Unmount the partition
  • You could terminate this instance is no longer needed
  • Attach the partition, to the same machine, don’t use the elasticI don’t know don’t work for me, use the aws web. IMPORTANT Attach to /dev/sda1.
  • Start the instance
  • That’s it, you have your instance recovered.

    Facebooktwitterredditpinterestlinkedinmail

    Recipe: how to mount external RAID-LVM disk

    Wednesday, August 18th, 2010

    I usually install Debian machines with software RAID and LVM, until today I have not needed to recover one disk from outside the the system. It is a little bit trick, I decide to make this post for my own interest and help others.

    Basically there are two step, to mount the RAID and to mount the LVM.

    First at all you can do a cfdisk to see the partitions:


    sdg5 Lógica Linux raid autodetect 3997,46 *
    sdg2 Primaria Linux raid autodetect 1003,49
    sdg3 Primaria Linux raid autodetect 395101,33
    sdg4 Primaria NTFS [] 100002,96

    Ok, The partition I am interested in is, /dev/sdg3.

    The I exec:

    # mdadm --examine --scan /dev/sdg3
    ARRAY /dev/md2 level=raid1 num-devices=2 UUID=10e9ab2b:97f55678:84e7df75:fb5ca897

    I edit the file /etc/mdadm/mdadm.conf and add this line to the ARRAY list.

    /etc/init.d/mdadm-raid stop
    /etc/init.d/mdadm-raid start
    Assembling MD array md2...done (degraded [1/2]).
    Generating udev events for MD arrays...done.

    Thats it !!I have the RAID subsystem mounted.
    # cat /proc/mdstat
    Personalities : [raid1]
    md2 : active (auto-read-only) raid1 sdg3[0]
    385841024 blocks [2/1] [U_]

    Now let’s go to the LVM part.

    # pvscan

    ...
    PV /dev/md2 VG rootmd lvm2 [367,96 GB / 188,00 MB free]
    ...

    # lvscan
    ....
    inactive '/dev/rootmd/rootvg' [18,00 GB] inherit
    inactive '/dev/rootmd/homevg' [349,78 GB] inherit
    ...

    To activate, use:


    #lvchange -ay rootmd/homevg
    #lvchange -ay rootmd/rootvg
    #lvscan

    ACTIVE '/dev/rootmd/rootvg' [18,00 GB] inherit
    ACTIVE '/dev/rootmd/homevg' [349,78 GB] inherit

    Ok, now we have All the volumes available:


    # mount /dev/rootmd/homevg /mnt1

    Facebooktwitterredditpinterestlinkedinmail

    Make your own Sundial

    Thursday, April 8th, 2010

    I have been always an amateur sciencist person, I like a lot Carl Sagan, astronomy, maths and computers. One devices that fascinated me a lot are sundials, I have combined it with my computer knowledge, and this is my contribution to the 2.0 sundial technology. 🙂 This post explain what I have done 🙂

    I have designed is about paper sundials, sundials are tools that tells you the time, only with the shadow of the sun, to design a sundial you need to know exactly, where are you going to put it, you need to know the longitude, the latitude and the orientation of the wall with respect to North.
    I have designed a web page, integrated with Google Maps, that helps you to find easily all the parameters needed, and finally produce a printable page, with a sundial paper cut, that can be cut and folded and give you a vertical Sundial.
    This page allows you to make your own Cut Out Paper Vertical Sundial customized to your place on earth and the declination of the wall you are going to put it.

    You will obtain a paper sundial like this:

    paper sundial

    the webpage gives you a printabel PDF, that you only need to cut and fold, this is a sample:

    paper sundial

    You can enjoy my webpage on: PAPER SUNDIALS

    Facebooktwitterredditpinterestlinkedinmail

    How to install samba on voyage Linux

    Sunday, April 4th, 2010

    On this post I will explain howto install samba on Voyage Linux 0.5 version. Voyage Linux is the distribution I have installed on the minimotherboard Alix.

    As you should know the systme doesn’t use a hard disk, It uses a Compact Flash memory card, that makes the hard disk functionality, I have a 8Gb compact Flash memory card where I have all teh space that I need.

    the main disavantage of Compact Flash media, is that they are not writable every times you need, They have a nunmber of times you can rewrite, this number is high, between 300 thousand to million, that is the reason taht all the system, the voyage Linux distribution, is mounted read-only. you have two scripts, “remountrw”, to mount the filesystem with write permissions, and “remountro” to remount read only.
    Moreover we have to take this into account on all the applications that need to write on disk.


    RAM writable directories

    Due that a lot of apps need to write in order to run, Voyage Linux, have a memory mounted partition where you can write, that is space is small (memory space), and is not permanent, you lost it where the system is rebooted.
    The trick is that exists a directory called /ro where is all the information that will be copied to teh volatile directory on boot-time, the script taht makes that copy is on /etc/init.d/mountall the last line makes the copy using tar , tar -C /ro -cf - . | tar -C /rw -xf - > /dev/null 2>&1

    And then when you need a writable directory yo make a link to the /rw directory, we can see an example with the var directory.


    /var# ls -l
    total 28
    drwxr-xr-x 2 root root 4096 Jul 3 06:25 backups
    drwxr-xr-x 6 root root 4096 Jun 26 16:34 cache
    drwxr-xr-x 2 root root 4096 Jun 26 23:20 ccxstream
    drwxr-xr-x 14 root root 4096 Jun 28 18:57 lib
    drwxrwsr-x 2 root staff 4096 Oct 28 2006 local
    lrwxrwxrwx 1 root root 12 Apr 15 00:28 lock -> /rw/var/lock
    lrwxrwxrwx 1 root root 11 Apr 15 00:28 log -> /rw/var/log
    lrwxrwxrwx 1 root root 12 Apr 15 00:28 mail -> /rw/var/mail
    drwxr-xr-x 2 root root 4096 Feb 17 01:22 opt
    lrwxrwxrwx 1 root root 11 Apr 15 00:28 run -> /rw/var/run
    lrwxrwxrwx 1 root root 13 Apr 15 00:28 spool -> /rw/var/spool
    lrwxrwxrwx 1 root root 11 Apr 15 00:28 tmp -> /rw/var/tmp
    drwxr-xr-x 3 root root 4096 Jun 30 23:27 www

    howo to install Samba

    One interesting function our embedded is file sharing, we can share flash contents and contects mounted on usb ports.

    This are the way to have it working:


    #remountrw
    #apt-get install samba
    #remountro

    since this point, It would be a normal samba installation on Debian, but if you try to boot samba it complans about file write permissions on the files located on /var/lib/samba, however samba works perfectly with remountrw, moreover we have to “convert” that files in writable ones.

    INSTRUCCTIONS to make a writeble directory and make Samba works.

    0.- We enable write permission ans install samba
    #remountrw
    apt-get install samba

    1.- Copy the directory /var/lib/samba to /ro/var/lib/samba
    tar -C /var/lib/samba -cf - . | tar -C /ro/var/lib/samba -xf -
    2.- create a symbolic link from /rw/var/lib/samba to /var/lib/samba

    mv /var/lib/samba /var/lib/samba.ori
    ln -s /rw/var/lib/samba a /var/lib/samba

    3.- Create a script to rewrite the files in case we made a modification we want persistent.

    echo "tar -C /rw/var/lib/samba -cf - . | tar -C /ro/var/lib/samba -xf -" >/usr/local/bin/recopysambafiles
    chmod +x /usr/local/bin/recopysambafile

    4.- Reboot the server
    reboot
    5.-User creation

    adduser nasuser
    smbpasswd -a nasuser
    remountrw
    /usr/local/bin/recopysambafile
    remountro
    /etc/init.d/samba restart

    We can check, It should work!! 🙂 The user could imagine with that example how to make work other apps like emule.

    Facebooktwitterredditpinterestlinkedinmail

    Debian running on Netgear Stora

    Thursday, April 1st, 2010

    debian on netgear stora

    As I explain on previous posts, I adquired a cheap two SATA bays home NAS, called Netgear Stora. After the disappointing privacy a features unfunctionalities the manufacturer give to us, the community again have achieved to develop an alternative way to open and use the software for this device, It is now achieved!! you can run an standard ARM Linux distribution on it!!

    The hardware have:
    -2 SATA bays.
    -1 GB ethernet port
    -1USB port
    -ARM CPU
    Processor : ARM926EJ-S rev 1 (v5l)
    BogoMIPS : 992.87

    -128Mb of RAM
    -220Mb of flash Storage
    -ventilator
    -LEDs power, disk1, disk2

    On my case, I have installed a flavor of Debian called emdebian.
    emdebian

    I have installed emdebian distribution on flash disk, but if you prefer, you could install a standard ARM Debian distribution using the hard disk.

    It is a fantastic hardware to have a home Debian server.

    If you are interested on this machine there is an active community on: http://hardwarehackersunite.com/.

    The how to instruction are here: Howo to install Debian on Netgear Stora

    Facebooktwitterredditpinterestlinkedinmail

    How to load balance 4 Modem Cable internet access

    Wednesday, March 24th, 2010

    Introduction

    Every year I assist to Benaguasil party and colabotate with the organization on technical issues, mainly Internet access, each year we have a different scenario, the sponsors one year give us an ADSL, other year a Cable modem, even a wifi access. We always have a Linux server that deals with the connection and give access to the LAN-party doing NAT,or proxy.

    This year (2005) we had four Cable Modems each one with 4MB download rate. The exact equipment were four cable modems with one Ethernet port with DHCP assignement (with no configuration options and no NAT option only single mode). We have a Linux server with five ethernet adapters.

    And we want to give this download thougput (4Mb x 4) to the LAN party.

    Aproaches

    We made a brainstorming thinking about how to use all four connections, some ideas, only one of them developed (Are all other posibles?).

    -We thought to use a comercial solution, like linkproof from radware, probably we could obtain one borrowed, but we have no clear experience about that product with four ethernets with dhcp on each port. But more important we want to make it work with free software 🙂 only with the Linux server.

    -SQUID: A network of squid caches, each one connected to a different Cable modem. Is posible to one squid on a multihomed host to balance connections? All questions unknow.

    -To distribute the hosts on LAN, giving each group of hosts a different default gateway. The problem was that we need four host to NAT, due that Modem Cable don’t allow NAT, single IP for each one. We had only one PC, to do everything, with for Pcs, or NAT capable routers this aproach could be achieved, but we didn’t try due to lack of PCs.

    -To statically NAT and route routing each group of client host for a specific gateway. This is very similar to the case before, but done with only on Pc, with source routing and NAT. I thought it is posible to do, buy we didn’t make it works.

    -To statically NAT and route routing each group of protocols for a specific gateway. This is basically the same, but making policiy routing works giving each protocol a routing gateway thought different cable modem, this solutions have an special characteristic, you could assign web trafic a Cable modem, P2P other Cable modem, having some QOS a service control.

    -To dynamicaly balance route and NAT. Better that do assignments of clients or protocols, we try this aproach that balance dinamically each line. This is what we are going to explain how we did it 🙂

    Choosing distribution

    I am a Debian fan, and then don’t try to install any other distribution. Then we install Debian sarge, however this tutorial have no very specific distribution issues, and I think it could work on any distribution with iptables toools, etc..

    The setup

    We have five ethernet interfaces, one of them is the internal LAN interface with a static IP, all others have dhcp ip assigned by the cable modem Operator Ono, our /etc/network/interfaces was:


    # The loopback interface
    # automatically added when upgrading
    auto lo
    iface lo inet loopback
    # automatically added when upgrading
    auto eth0
    iface eth0 inet static
    address 192.168.1.1
    netmask 255.255.0.0
    ##
    auto eth1
    iface eth1 inet dhcp
    ##
    auto eth2
    iface eth2 inet dhcp
    ##
    auto eth3
    iface eth3 inet dhcp
    ##
    auto eth4
    iface eth4 inet dhcp

    Restating networking we had the ip assignement:

    Interface IP Netmask default_gateway
    eth0 192.168.1.1 255.255.0.0
    eth1 81.203.149.126 255.255.224.0 81.203.144.1
    eth2 81.203.144.81 255.255.224.0 81.203.144.1
    eth3 81.203.128.69 255.255.224.0 81.203.128.1
    eth4 81.203.144.88 255.255.224.0 81.203.144.1

    To see the default route of each interface we use netstat -nrv and we saw that we have two diffentet default gateways.

    Then we create two scripts, that makes the line balancer works…

    route del default
    route del default
    route del default
    route del default
    ip route add default equalize scope global \
    nexthop via 81.203.144.1 dev eth1 weight 1 \
    nexthop via 81.203.144.1 dev eth2 weight 1 \
    nexthop via 81.203.128.1 dev eth3 weight 1 \
    nexthop via 81.203.144.1 dev eth4 weight 1

    To check everything OK, netstat -nrv is not useful, you have to use ip route list.


    IPTABLES=/sbin/iptables

    $IPTABLES -t nat -A POSTROUTING -o $EXTIF1 -j SNAT --to-source 81.203.149.126
    $IPTABLES -t nat -A POSTROUTING -o $EXTIF2 -j SNAT --to-source 81.203.144.81
    $IPTABLES -t nat -A POSTROUTING -o $EXTIF3 -j SNAT --to-source 81.203.128.69
    $IPTABLES -t nat -A POSTROUTING -o $EXTIF4 -j SNAT --to-source 81.203.144.88

    To see thing woking, one useful tool is iptraf 🙂

    Problems and TODO

    How can we see the default gateway assignement on each interface, how can we use it autoamtically on our scripts.

    How the balance is performed? Could be tuned or customized?

    Facebooktwitterredditpinterestlinkedinmail