Recipe: how to mount external RAID-LVM disk

August 18th, 2010

I usually install Debian machines with software RAID and LVM, until today I have not needed to recover one disk from outside the the system. It is a little bit trick, I decide to make this post for my own interest and help others.

Basically there are two step, to mount the RAID and to mount the LVM.

First at all you can do a cfdisk to see the partitions:


sdg5 LΓ³gica Linux raid autodetect 3997,46 *
sdg2 Primaria Linux raid autodetect 1003,49
sdg3 Primaria Linux raid autodetect 395101,33
sdg4 Primaria NTFS [] 100002,96

Ok, The partition I am interested in is, /dev/sdg3.

The I exec:

# mdadm --examine --scan /dev/sdg3
ARRAY /dev/md2 level=raid1 num-devices=2 UUID=10e9ab2b:97f55678:84e7df75:fb5ca897

I edit the file /etc/mdadm/mdadm.conf and add this line to the ARRAY list.

/etc/init.d/mdadm-raid stop
/etc/init.d/mdadm-raid start
Assembling MD array md2...done (degraded [1/2]).
Generating udev events for MD arrays...done.

Thats it !!I have the RAID subsystem mounted.
# cat /proc/mdstat
Personalities : [raid1]
md2 : active (auto-read-only) raid1 sdg3[0]
385841024 blocks [2/1] [U_]

Now let’s go to the LVM part.

# pvscan

...
PV /dev/md2 VG rootmd lvm2 [367,96 GB / 188,00 MB free]
...

# lvscan
....
inactive '/dev/rootmd/rootvg' [18,00 GB] inherit
inactive '/dev/rootmd/homevg' [349,78 GB] inherit
...

To activate, use:


#lvchange -ay rootmd/homevg
#lvchange -ay rootmd/rootvg
#lvscan

ACTIVE '/dev/rootmd/rootvg' [18,00 GB] inherit
ACTIVE '/dev/rootmd/homevg' [349,78 GB] inherit

Ok, now we have All the volumes available:


# mount /dev/rootmd/homevg /mnt1

Facebooktwitterredditpinterestlinkedinmail

Make your own Sundial

April 8th, 2010

I have been always an amateur sciencist person, I like a lot Carl Sagan, astronomy, maths and computers. One devices that fascinated me a lot are sundials, I have combined it with my computer knowledge, and this is my contribution to the 2.0 sundial technology. πŸ™‚ This post explain what I have done πŸ™‚

I have designed is about paper sundials, sundials are tools that tells you the time, only with the shadow of the sun, to design a sundial you need to know exactly, where are you going to put it, you need to know the longitude, the latitude and the orientation of the wall with respect to North.
I have designed a web page, integrated with Google Maps, that helps you to find easily all the parameters needed, and finally produce a printable page, with a sundial paper cut, that can be cut and folded and give you a vertical Sundial.
This page allows you to make your own Cut Out Paper Vertical Sundial customized to your place on earth and the declination of the wall you are going to put it.

You will obtain a paper sundial like this:

paper sundial

the webpage gives you a printabel PDF, that you only need to cut and fold, this is a sample:

paper sundial

You can enjoy my webpage on: PAPER SUNDIALS

Facebooktwitterredditpinterestlinkedinmail

How to install samba on voyage Linux

April 4th, 2010

On this post I will explain howto install samba on Voyage Linux 0.5 version. Voyage Linux is the distribution I have installed on the minimotherboard Alix.

As you should know the systme doesn’t use a hard disk, It uses a Compact Flash memory card, that makes the hard disk functionality, I have a 8Gb compact Flash memory card where I have all teh space that I need.

the main disavantage of Compact Flash media, is that they are not writable every times you need, They have a nunmber of times you can rewrite, this number is high, between 300 thousand to million, that is the reason taht all the system, the voyage Linux distribution, is mounted read-only. you have two scripts, “remountrw”, to mount the filesystem with write permissions, and “remountro” to remount read only.
Moreover we have to take this into account on all the applications that need to write on disk.


RAM writable directories

Due that a lot of apps need to write in order to run, Voyage Linux, have a memory mounted partition where you can write, that is space is small (memory space), and is not permanent, you lost it where the system is rebooted.
The trick is that exists a directory called /ro where is all the information that will be copied to teh volatile directory on boot-time, the script taht makes that copy is on /etc/init.d/mountall the last line makes the copy using tar , tar -C /ro -cf - . | tar -C /rw -xf - > /dev/null 2>&1

And then when you need a writable directory yo make a link to the /rw directory, we can see an example with the var directory.


/var# ls -l
total 28
drwxr-xr-x 2 root root 4096 Jul 3 06:25 backups
drwxr-xr-x 6 root root 4096 Jun 26 16:34 cache
drwxr-xr-x 2 root root 4096 Jun 26 23:20 ccxstream
drwxr-xr-x 14 root root 4096 Jun 28 18:57 lib
drwxrwsr-x 2 root staff 4096 Oct 28 2006 local
lrwxrwxrwx 1 root root 12 Apr 15 00:28 lock -> /rw/var/lock
lrwxrwxrwx 1 root root 11 Apr 15 00:28 log -> /rw/var/log
lrwxrwxrwx 1 root root 12 Apr 15 00:28 mail -> /rw/var/mail
drwxr-xr-x 2 root root 4096 Feb 17 01:22 opt
lrwxrwxrwx 1 root root 11 Apr 15 00:28 run -> /rw/var/run
lrwxrwxrwx 1 root root 13 Apr 15 00:28 spool -> /rw/var/spool
lrwxrwxrwx 1 root root 11 Apr 15 00:28 tmp -> /rw/var/tmp
drwxr-xr-x 3 root root 4096 Jun 30 23:27 www

howo to install Samba

One interesting function our embedded is file sharing, we can share flash contents and contects mounted on usb ports.

This are the way to have it working:


#remountrw
#apt-get install samba
#remountro

since this point, It would be a normal samba installation on Debian, but if you try to boot samba it complans about file write permissions on the files located on /var/lib/samba, however samba works perfectly with remountrw, moreover we have to “convert” that files in writable ones.

INSTRUCCTIONS to make a writeble directory and make Samba works.

0.- We enable write permission ans install samba
#remountrw
apt-get install samba

1.- Copy the directory /var/lib/samba to /ro/var/lib/samba
tar -C /var/lib/samba -cf - . | tar -C /ro/var/lib/samba -xf -
2.- create a symbolic link from /rw/var/lib/samba to /var/lib/samba

mv /var/lib/samba /var/lib/samba.ori
ln -s /rw/var/lib/samba a /var/lib/samba

3.- Create a script to rewrite the files in case we made a modification we want persistent.

echo "tar -C /rw/var/lib/samba -cf - . | tar -C /ro/var/lib/samba -xf -" >/usr/local/bin/recopysambafiles
chmod +x /usr/local/bin/recopysambafile

4.- Reboot the server
reboot
5.-User creation

adduser nasuser
smbpasswd -a nasuser
remountrw
/usr/local/bin/recopysambafile
remountro
/etc/init.d/samba restart

We can check, It should work!! πŸ™‚ The user could imagine with that example how to make work other apps like emule.

Facebooktwitterredditpinterestlinkedinmail

Debian running on Netgear Stora

April 1st, 2010

debian on netgear stora

As I explain on previous posts, I adquired a cheap two SATA bays home NAS, called Netgear Stora. After the disappointing privacy a features unfunctionalities the manufacturer give to us, the community again have achieved to develop an alternative way to open and use the software for this device, It is now achieved!! you can run an standard ARM Linux distribution on it!!

The hardware have:
-2 SATA bays.
-1 GB ethernet port
-1USB port
-ARM CPU
Processor : ARM926EJ-S rev 1 (v5l)
BogoMIPS : 992.87

-128Mb of RAM
-220Mb of flash Storage
-ventilator
-LEDs power, disk1, disk2

On my case, I have installed a flavor of Debian called emdebian.
emdebian

I have installed emdebian distribution on flash disk, but if you prefer, you could install a standard ARM Debian distribution using the hard disk.

It is a fantastic hardware to have a home Debian server.

If you are interested on this machine there is an active community on: http://hardwarehackersunite.com/.

The how to instruction are here: Howo to install Debian on Netgear Stora

Facebooktwitterredditpinterestlinkedinmail

How to load balance 4 Modem Cable internet access

March 24th, 2010

Introduction

Every year I assist to Benaguasil party and colabotate with the organization on technical issues, mainly Internet access, each year we have a different scenario, the sponsors one year give us an ADSL, other year a Cable modem, even a wifi access. We always have a Linux server that deals with the connection and give access to the LAN-party doing NAT,or proxy.

This year (2005) we had four Cable Modems each one with 4MB download rate. The exact equipment were four cable modems with one Ethernet port with DHCP assignement (with no configuration options and no NAT option only single mode). We have a Linux server with five ethernet adapters.

And we want to give this download thougput (4Mb x 4) to the LAN party.

Aproaches

We made a brainstorming thinking about how to use all four connections, some ideas, only one of them developed (Are all other posibles?).

-We thought to use a comercial solution, like linkproof from radware, probably we could obtain one borrowed, but we have no clear experience about that product with four ethernets with dhcp on each port. But more important we want to make it work with free software πŸ™‚ only with the Linux server.

-SQUID: A network of squid caches, each one connected to a different Cable modem. Is posible to one squid on a multihomed host to balance connections? All questions unknow.

-To distribute the hosts on LAN, giving each group of hosts a different default gateway. The problem was that we need four host to NAT, due that Modem Cable don’t allow NAT, single IP for each one. We had only one PC, to do everything, with for Pcs, or NAT capable routers this aproach could be achieved, but we didn’t try due to lack of PCs.

-To statically NAT and route routing each group of client host for a specific gateway. This is very similar to the case before, but done with only on Pc, with source routing and NAT. I thought it is posible to do, buy we didn’t make it works.

-To statically NAT and route routing each group of protocols for a specific gateway. This is basically the same, but making policiy routing works giving each protocol a routing gateway thought different cable modem, this solutions have an special characteristic, you could assign web trafic a Cable modem, P2P other Cable modem, having some QOS a service control.

-To dynamicaly balance route and NAT. Better that do assignments of clients or protocols, we try this aproach that balance dinamically each line. This is what we are going to explain how we did it πŸ™‚

Choosing distribution

I am a Debian fan, and then don’t try to install any other distribution. Then we install Debian sarge, however this tutorial have no very specific distribution issues, and I think it could work on any distribution with iptables toools, etc..

The setup

We have five ethernet interfaces, one of them is the internal LAN interface with a static IP, all others have dhcp ip assigned by the cable modem Operator Ono, our /etc/network/interfaces was:


# The loopback interface
# automatically added when upgrading
auto lo
iface lo inet loopback
# automatically added when upgrading
auto eth0
iface eth0 inet static
address 192.168.1.1
netmask 255.255.0.0
##
auto eth1
iface eth1 inet dhcp
##
auto eth2
iface eth2 inet dhcp
##
auto eth3
iface eth3 inet dhcp
##
auto eth4
iface eth4 inet dhcp

Restating networking we had the ip assignement:

Interface IP Netmask default_gateway
eth0 192.168.1.1 255.255.0.0
eth1 81.203.149.126 255.255.224.0 81.203.144.1
eth2 81.203.144.81 255.255.224.0 81.203.144.1
eth3 81.203.128.69 255.255.224.0 81.203.128.1
eth4 81.203.144.88 255.255.224.0 81.203.144.1

To see the default route of each interface we use netstat -nrv and we saw that we have two diffentet default gateways.

Then we create two scripts, that makes the line balancer works…

route del default
route del default
route del default
route del default
ip route add default equalize scope global \
nexthop via 81.203.144.1 dev eth1 weight 1 \
nexthop via 81.203.144.1 dev eth2 weight 1 \
nexthop via 81.203.128.1 dev eth3 weight 1 \
nexthop via 81.203.144.1 dev eth4 weight 1

To check everything OK, netstat -nrv is not useful, you have to use ip route list.


IPTABLES=/sbin/iptables

$IPTABLES -t nat -A POSTROUTING -o $EXTIF1 -j SNAT --to-source 81.203.149.126
$IPTABLES -t nat -A POSTROUTING -o $EXTIF2 -j SNAT --to-source 81.203.144.81
$IPTABLES -t nat -A POSTROUTING -o $EXTIF3 -j SNAT --to-source 81.203.128.69
$IPTABLES -t nat -A POSTROUTING -o $EXTIF4 -j SNAT --to-source 81.203.144.88

To see thing woking, one useful tool is iptraf πŸ™‚

Problems and TODO

How can we see the default gateway assignement on each interface, how can we use it autoamtically on our scripts.

How the balance is performed? Could be tuned or customized?

Facebooktwitterredditpinterestlinkedinmail

Linux on Netgear Stora

March 24th, 2010

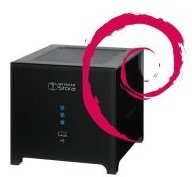
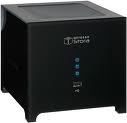
As a birthday present my wife give me a SOHO Nas Netgear Stora, the device is very affordable, and have good hardware features, one gigabit Ehernet card, 2 SATA bays (for RAID 1), and 1 USB external port.

netgear stora hacked with linux

The default factory software is very impressive, but can tell about it too bad and too good things, It have amazing features, some arbitrary limits and some scary features with serious privacy and loos of control concerns.

The main arbitrary limits are:

-RAID 1 as only posible setup of disk, if you want to have two disk wituot mirror you can’t.

-Limit the number of user to 3 (this limit and others must be eliminated paying a subscription!! πŸ™ ).

-Lacks some services and protocols like rsync, nfs, or console access.

The device is capable of serving your content on local LAN with SAMBA (windows shares), and is capable to serve the content with via web with http, you can access your content from your LAN, and even from any point of Internet, you can access your photos, your videos, your documents from any point of Internet, the device is able to modify your router setup, (via Upnp), and give access to external access. It have amazing features, via web you can listen your MP3, see your videos, amazing for a non expert user.

The concerns came when you realize that to access as a administrator of your device, you have to access throught the Netgear portal, your NAS is not administrable without Internet acess (and Netgear server availability), once the NAs is setup it can server contents on LAN, buy you can’t do any administration task witout Internet.Β  What happen if Netgear have availability problems? And you Internet provider avalability? And What happen if Netgear have security problems? All your private files would be available for everyone?

With that drawbacks, I was seriosly thinking about returning the device, but I thought, What if could run a fully controled Linux version where we can add all the features we need, less commercial and user-friendly but with all the control?? Thinking about the same I have with the linksys router, Siemens Gigaset, etc.

Due to the device is new in the market, there are still no alternative firmwares, the developer community (hacker community as a good term), still have no time to develop, buy they discover they could obtain root, and in short term It will be possible to install all you wish, It will be possible to install Debian, Then I have decide to wait to that πŸ™‚

If you are interested on developments to free the device, visit http://hardwarehackersunite.com/ you will find people working on that, There will be advances soon..

Some info obtained from the shell of the device:

# dmesg
Linux version 2.6.22.18-Netgear (tgk@fc10-64bit) (gcc version 4.2.1) #4 Thu Sep 3 13:29:25 EDT 2009
CPU: ARM926EJ-S [56251311] revision 1 (ARMv5TE), cr=00053977
Machine: Feroceon-KW
Using UBoot passing parameters structure
Memory policy: ECC disabled, Data cache writeback
On node 0 totalpages: 32768
DMA zone: 256 pages used for memmap
DMA zone: 0 pages reserved
DMA zone: 32512 pages, LIFO batch:7
Normal zone: 0 pages used for memmap
CPU0: D VIVT write-back cache
CPU0: I cache: 16384 bytes, associativity 4, 32 byte lines, 128 sets
CPU0: D cache: 16384 bytes, associativity 4, 32 byte lines, 128 sets
Built 1 zonelists. Total pages: 32512
Kernel command line: console=ttyS0,115200 ubi.mtd=2,2048 root=ubi0:rootfs rootfstype=ubifs init=/linuxrc
PID hash table entries: 512 (order: 9, 2048 bytes)
Console: colour dummy device 80×30
Dentry cache hash table entries: 16384 (order: 4, 65536 bytes)
Inode-cache hash table entries: 8192 (order: 3, 32768 bytes)
Memory: 64MB 64MB 0MB 0MB = 128MB total
Memory: 125312KB available (4204K code, 272K data, 112K init)
Calibrating delay loop… 992.87 BogoMIPS (lpj=4964352)
Mount-cache hash table entries: 512
CPU: Testing write buffer coherency: ok
NET: Registered protocol family 16

CPU Interface
————-
SDRAM_CS0 ….base 00000000, size 64MB
SDRAM_CS1 ….base 04000000, size 64MB
SDRAM_CS2 ….disable
SDRAM_CS3 ….disable
PEX0_MEM ….base e8000000, size 128MB
PEX0_IO ….base f2000000, size 1MB
INTER_REGS ….base f1000000, size 1MB
NFLASH_CS ….base fa000000, size 2MB
SPI_CS ….base f4000000, size 16MB
BOOT_ROM_CS ….no such
DEV_BOOTCS ….no such
CRYPT_ENG ….base f0000000, size 2MB

Marvell Development Board (LSP Version KW_LSP_4.2.7_patch21)– RD-88F6281A Soc: 88F6281 A0 LE

Detected Tclk 200000000 and SysClk 333333333
MV Buttons Device Load
Marvell USB EHCI Host controller #0: c05d4600
PEX0 interface detected no Link.
PCI: bus0: Fast back to back transfers enabled
SCSI subsystem initialized
usbcore: registered new interface driver usbfs
usbcore: registered new interface driver hub
usbcore: registered new device driver usb
NET: Registered protocol family 2
Time: kw_clocksource clocksource has been installed.
IP route cache hash table entries: 1024 (order: 0, 4096 bytes)
TCP established hash table entries: 4096 (order: 3, 32768 bytes)
TCP bind hash table entries: 4096 (order: 2, 16384 bytes)
TCP: Hash tables configured (established 4096 bind 4096)
TCP reno registered
RTC has been updated!!!
RTC registered
Use the XOR engines (acceleration) for enhancing the following functions:
o RAID 5 Xor calculation
o kernel memcpy
o kenrel memzero
Number of XOR engines to use: 4
cesadev_init(c000c8e4)
mvCesaInit: sessions=640, queue=64, pSram=f0000000
MV Buttons Driver Load
JFFS2 version 2.2. (NAND) © 2001-2006 Red Hat, Inc.
io scheduler noop registered
io scheduler anticipatory registered (default)
Serial: 8250/16550 driver $Revision: 1.90 $ 4 ports, IRQ sharing disabled
serial8250.0: ttyS0 at MMIO 0xf1012000 (irq = 33) is a 16550A
serial8250.0: ttyS1 at MMIO 0xf1012100 (irq = 34) is a 16550A
loop: module loaded
Loading Marvell Ethernet Driver:
o Cached descriptors in DRAM
o DRAM SW cache-coherency
o Multi RX Queue support – 4 RX queues
o Multi TX Queue support – 2 TX Queues
o TCP segmentation offload enabled
o Receive checksum offload enabled
o Transmit checksum offload enabled
o Network Fast Processing (Routing) supported
o Network Fast Processing (NAT) supported
o Driver ERROR statistics enabled
o Driver INFO statistics enabled
o Proc tool API enabled
o Gateway support enabled
o Using Marvell Header Mode
o L2 IGMP support
o Rx descripors: q0=128 q1=128 q2=128 q3=128
o Tx descripors: q0=532 q1=532
o Loading network interface(s):
o eth0, ifindex = 1, GbE port = 0
o eth1, ifindex = 2, GbE port = 1

mvFpRuleDb (c7fd0000): 1024 entries, 4096 bytes
Intel(R) PRO/1000 Network Driver – version 7.3.20-k2-NAPI
Copyright (c) 1999-2006 Intel Corporation.
e100: Intel(R) PRO/100 Network Driver, 3.5.17-k4-NAPI
e100: Copyright(c) 1999-2006 Intel Corporation
Integrated Sata device found
scsi0 : Marvell SCSI to SATA adapter
scsi1 : Marvell SCSI to SATA adapter
scsi 0:0:0:0: Direct-Access Seagate ST31000528AS CC38 PQ: 0 ANSI: 5
sd 0:0:0:0: [sda] 1953525168 512-byte hardware sectors (1000205 MB)
sd 0:0:0:0: [sda] Write Protect is off
sd 0:0:0:0: [sda] Mode Sense: 23 00 10 00
sd 0:0:0:0: [sda] Write cache: enabled, read cache: enabled, supports DPO and FUA
sd 0:0:0:0: [sda] 1953525168 512-byte hardware sectors (1000205 MB)
sd 0:0:0:0: [sda] Write Protect is off
sd 0:0:0:0: [sda] Mode Sense: 23 00 10 00
sd 0:0:0:0: [sda] Write cache: enabled, read cache: enabled, supports DPO and FUA
sda: sda1
sd 0:0:0:0: [sda] Attached SCSI disk
sd 0:0:0:0: Attached scsi generic sg0 type 0
NFTL driver: nftlcore.c $Revision: 1.98 $, nftlmount.c $Revision: 1.41 $
NAND device: Manufacturer ID: 0xec, Chip ID: 0xda (Samsung NAND 256MiB 3,3V 8-bit)
Scanning device for bad blocks
Bad eraseblock 166 at 0x014c0000
Bad eraseblock 807 at 0x064e0000
Bad eraseblock 1190 at 0x094c0000
Using static partition definition
Creating 3 MTD partitions on “nand_mtd”:
0x00000000-0x00100000 : “u-boot”
0x00100000-0x00700000 : “uImage”
0x00700000-0x10000000 : “root”
UBI: attaching mtd2 to ubi0
UBI: physical eraseblock size: 131072 bytes (128 KiB)
UBI: logical eraseblock size: 126976 bytes
UBI: smallest flash I/O unit: 2048
UBI: sub-page size: 512
UBI: VID header offset: 2048 (aligned 2048)
UBI: data offset: 4096
UBI: attached mtd2 to ubi0
UBI: MTD device name: “root”
UBI: MTD device size: 249 MiB
UBI: number of good PEBs: 1989
UBI: number of bad PEBs: 3
UBI: max. allowed volumes: 128
UBI: wear-leveling threshold: 4096
UBI: number of internal volumes: 1
UBI: number of user volumes: 1
UBI: available PEBs: 0
UBI: total number of reserved PEBs: 1989
UBI: number of PEBs reserved for bad PEB handling: 19
UBI: max/mean erase counter: 1/0
UBI: background thread “ubi_bgt0d” started, PID 295
ehci_marvell ehci_marvell.70059: Marvell Orion EHCI
ehci_marvell ehci_marvell.70059: new USB bus registered, assigned bus number 1
ehci_marvell ehci_marvell.70059: irq 19, io base 0xf1050100
ehci_marvell ehci_marvell.70059: USB 2.0 started, EHCI 1.00, driver 10 Dec 2004
usb usb1: configuration #1 chosen from 1 choice
hub 1-0:1.0: USB hub found
hub 1-0:1.0: 1 port detected
ohci_hcd: 2006 August 04 USB 1.1 ‘Open’ Host Controller (OHCI) Driver
USB Universal Host Controller Interface driver v3.0
usbcore: registered new interface driver usblp
drivers/usb/class/usblp.c: v0.13: USB Printer Device Class driver
Initializing USB Mass Storage driver…
usbcore: registered new interface driver usb-storage
USB Mass Storage support registered.
mice: PS/2 mouse device common for all mice
i2c /dev entries driver
Linux telephony interface: v1.00
md: linear personality registered for level -1
md: raid0 personality registered for level 0
md: raid1 personality registered for level 1
raid6: int32x1 81 MB/s
raid6: int32x2 95 MB/s
raid6: int32x4 102 MB/s
raid6: int32x8 92 MB/s
raid6: using algorithm int32x4 (102 MB/s)
md: raid6 personality registered for level 6
md: raid5 personality registered for level 5
md: raid4 personality registered for level 4
raid5: measuring checksumming speed
arm4regs : 903.600 MB/sec
8regs : 629.200 MB/sec
32regs : 750.000 MB/sec
raid5: using function: arm4regs (903.600 MB/sec)
device-mapper: ioctl: 4.11.0-ioctl (2006-10-12) initialised: dm-devel@redhat.com
dm_crypt using the OCF package.
sdhci: Secure Digital Host Controller Interface driver
sdhci: Copyright(c) Pierre Ossman
usbcore: registered new interface driver usbhid
drivers/hid/usbhid/hid-core.c: v2.6:USB HID core driver
Advanced Linux Sound Architecture Driver Version 1.0.14 (Thu May 31 09:03:25 2007 UTC).
ALSA device list:
#0: Marvell mv88fx_snd ALSA driver
Netfilter messages via NETLINK v0.30.
nf_conntrack version 0.5.0 (1024 buckets, 8192 max)
mvFpNatDb (c7e72000): 1024 entries, 4096 bytes
ip_tables: (C) 2000-2006 Netfilter Core Team
TCP cubic registered
NET: Registered protocol family 1
NET: Registered protocol family 17
NFP (fdb) init 256 entries, 1024 bytes
Bridge firewalling registered
802.1Q VLAN Support v1.8 Ben Greear
All bugs added by David S. Miller
md: Autodetecting RAID arrays.
md: autorun …
md: considering sda1 …
md: adding sda1 …
md: created md0
md: bind
md: running:
raid1: raid set md0 active with 1 out of 2 mirrors
md: … autorun DONE.
UBIFS: mounted UBI device 0, volume 0, name “rootfs”
UBIFS: file system size: 239857664 bytes (234236 KiB, 228 MiB, 1889 LEBs)
UBIFS: journal size: 9023488 bytes (8812 KiB, 8 MiB, 72 LEBs)
UBIFS: media format: 4 (latest is 4)
UBIFS: default compressor: zlib
UBIFS: reserved for root: 0 bytes (0 KiB)
VFS: Mounted root (ubifs filesystem).
Freeing init memory: 112K
Failed to execute /linuxrc. Attempting defaults…
mvsdmmc: irq =28 start f1090000
mvsdmmc: irq_detect=92
SGI XFS with ACLs, large block numbers, no debug enabled
XFS mounting filesystem md0
Starting XFS recovery on filesystem: md0 (logdev: internal)
Ending XFS recovery on filesystem: md0 (logdev: internal)
eth0: link down
eth0: started
eth0: link up, full duplex, speed 100 Mbps
tun: Universal TUN/TAP device driver, 1.6
tun: (C) 1999-2004 Max Krasnyansky
Adding 511992k swap on /home/.swapfile. Priority:-1 extents:1 across:511992k


# cat /proc/cpuinfo
Processor : ARM926EJ-S rev 1 (v5l)
BogoMIPS : 992.87
Features : swp half thumb fastmult edsp
CPU implementer : 0x56
CPU architecture: 5TE
CPU variant : 0x2
CPU part : 0x131
CPU revision : 1
Cache type : write-back
Cache clean : cp15 c7 ops
Cache lockdown : format C
Cache format : Harvard
I size : 16384
I assoc : 4
I line length : 32
I sets : 128
D size : 16384
D assoc : 4
D line length : 32
D sets : 128

Hardware : Feroceon-KW
Revision : 0000
Serial : 0000000000000000


# cat meminfo
MemTotal: 125428 kB
MemFree: 2268 kB
Buffers: 0 kB
Cached: 79388 kB
SwapCached: 16 kB
Active: 61464 kB
Inactive: 35612 kB
SwapTotal: 511992 kB
SwapFree: 510876 kB
Dirty: 0 kB
Writeback: 0 kB
AnonPages: 17688 kB
Mapped: 15872 kB
Slab: 20140 kB
SReclaimable: 1244 kB
SUnreclaim: 18896 kB
PageTables: 1004 kB
NFS_Unstable: 0 kB
Bounce: 0 kB
CommitLimit: 574704 kB
Committed_AS: 180544 kB
VmallocTotal: 516096 kB
VmallocUsed: 2036 kB
VmallocChunk: 514052 kB

Happy coding!!

Facebooktwitterredditpinterestlinkedinmail